In today’s digital age, as businesses continue to expand their remote work capabilities and individuals become increasingly concerned about privacy, the need for a reliable Virtual Private Network (VPN) has never been more pronounced.
VPNs play a pivotal role in securing data transmissions, offering private browsing experiences, and allowing access to restricted content. Among the myriad of available VPN solutions, OpenVPN stands out as an open-source option that’s both powerful and flexible, making it a preferred choice for many.
OpenVPN Access Server (often abbreviated as OpenVPN AS) builds upon the foundation set by the open-source OpenVPN project. It provides an enhanced, commercially-focused version of the software, simplifying many of the challenges involved in setting up and maintaining a VPN.
While the underlying open-source OpenVPN demands manual configuration through command lines, OpenVPN AS offers a user-friendly web interface, making the entire process of VPN management considerably more straightforward.
In this guide, we aim to walk you through the intricate steps involved in setting up the OpenVPN Access Server on Ubuntu 22.04. By its end, you’ll have a fully functional VPN server ready to serve your data transmission needs, be it for a business environment or personal use.
So, whether you’re looking to establish a remote work infrastructure, secure your data, or bypass geo-restrictions, buckle up, as we delve deep into the world of OpenVPN on Ubuntu 22.04.
Why Set Up OpenVPN On Ubuntu 22.04?
Ubuntu, one of the world’s most popular Linux distributions, is renowned for its stability, wide support, and robust community. Ubuntu 22.04, its latest LTS (Long Term Support) release as of this writing, serves as a perfect platform for setting up a secure and efficient VPN system using OpenVPN AS.
By merging the strengths of both OpenVPN AS and Ubuntu 22.04, users can expect a synergy of security, performance, and ease of use.
Why Set Up Your Own VPN Server?
Establishing your own VPN server, rather than relying on commercial VPN services, can offer a myriad of benefits tailored to individual needs. Setting up a personal VPN server ensures:
- Control & Customization: You have full control over the server’s configuration, allowing you to tailor security protocols and settings to your unique requirements.
- Data Privacy: By managing your own VPN, you prevent third-party VPN providers from potentially logging or monitoring your traffic. Your data remains truly private.
- Consistent Performance: Commercial VPNs can sometimes suffer from congestion due to a high number of users. With a personal VPN server, you get consistent speed and performance.
- Cost-Effective in the Long Run: While there’s an initial setup cost, in the long run, you could save money as you won’t be paying monthly or yearly subscription fees to commercial providers.
- Bypassing Content Restrictions: Just like commercial VPNs, your personal VPN allows you to bypass geo-blocks and censorship, granting access to global content.
- Enhanced Security: With the autonomy to select and update encryption methods, you can ensure that your VPN server employs the latest security standards.
In essence, owning and managing a personal VPN server offers unparalleled control and assurance over data privacy and transmission, making it an attractive choice for individuals and businesses aiming for the highest levels of digital security and performance.
Prerequisites for Setting Up OpenVPN Access Server on Ubuntu 22.04
Before diving into the installation and configuration process of OpenVPN Access Server on Ubuntu 22.04, there are certain prerequisites and considerations to keep in mind. Ensuring you meet these requirements will guarantee a smoother setup experience:
- A Server with Ubuntu 22.04 Installed: The primary requirement is a server running Ubuntu 22.04 LTS. This ensures compatibility and stability with the OpenVPN Access Server software.
- Virtual Private Server (VPS):
- If you don’t have a physical server, a VPS can serve as an excellent alternative. Providers such as DigitalOcean, Contabo, and Vultr offer scalable VPS solutions.
- Opt for a VPS with a decent amount of RAM (at least 1 GB) and sufficient storage space to handle the VPN software and its operations.
- The advantage of a VPS is its flexibility. You can easily scale up or down based on your requirements.
- Ensure that your VPS provider allows VPN operations. Some providers have restrictions on running VPN servers, so it’s crucial to check their terms of service.
- A User Account with Sudo Privileges: For the installation and configuration processes, you’ll need an account on the server that has sudo (superuser) privileges. This allows you to execute commands that require root permissions.
- A Valid Domain Name (Optional, but Recommended):
- While not strictly necessary, having a domain name pointing to your server’s IP address can make client configurations and connections more straightforward and professional.
- Providers like Namecheap or GoDaddy can help you secure a domain name. Afterward, configure its DNS settings to point to your VPS or server’s IP address.
Once you’ve ensured all the prerequisites are in place, you’re well on your way to setting up OpenVPN Access Server on Ubuntu 22.04 seamlessly.
Set Up OpenVPN Access Server on Ubuntu 22.04
Step 1: Update the System
Begin by ensuring your system is up-to-date:
sudo apt update && sudo apt upgrade -y
Step 2: Add the OpenVPN Access Server Repository
Next add the OpenVPN Access Server repository for Ubuntu that enables you to fetch and install the software.
echo "deb [signed-by=/etc/apt/keyrings/openvpn-as.gpg.key] http://as-repository.openvpn.net/as/debian $(lsb_release -cs) main" | sudo tee /etc/apt/sources.list.d/openvpn-as.list
Step 3: Add the OpenVPN Access Server Repository
Software repositories should be signed with a key to ensure that the software you install from them is genuine and hasn’t been tampered with. To add the key:
wget --quiet -O - https://as-repository.openvpn.net/as-repo-public.gpg | sudo tee /etc/apt/keyrings/openvpn-as.gpg.key
Also run this command to add the prerequisite for HTTPS repositories in Debian-based systems like Ubuntu.
sudo apt install apt-transport-https ca-certificates
By installing these packages, you are equipping your system with the capability to securely fetch packages from HTTPS-based repositories. This is often a necessary step before adding such repositories to your system’s list of sources.
Lastly, refresh your Ubuntu system’s package list and proceed with the installation of OpenVPN Access Server.
sudo apt update

sudo apt install -y openvpn-as
Step 4: Set Up the Admin Account
By default, the OpenVPN AS creates a user named ‘openvpn’ and randomly generates a password for the admin account. URLs for the admin panel and client panel will also be displayed as shown below.
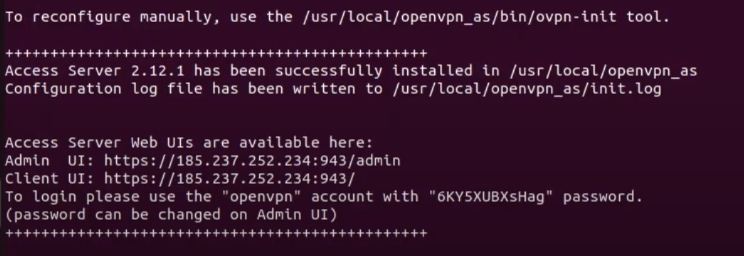
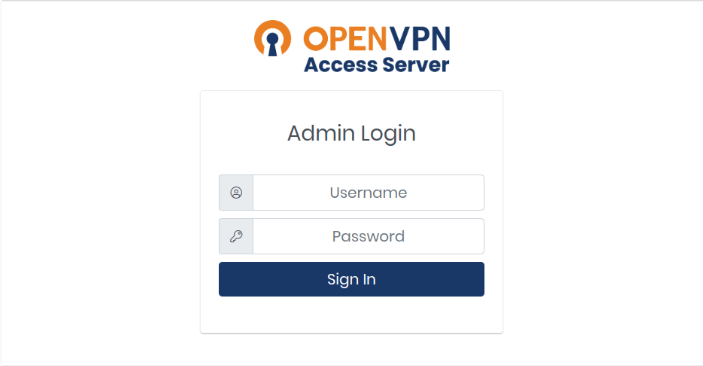
Step 5: Access the Web Interface
Once installed, OpenVPN AS will start automatically. You can access the admin web interface through your web browser:
https://your_server_ip_or_domain_name:943/admin
Step 6: Basic Configuration
- Network Settings: Navigate to Configuration > Network Settings. Set the ‘Hostname or IP Address’ to your server’s public IP or domain name. This will be used by clients to connect to the server.
- VPN Settings: Under Configuration > VPN Settings, you can specify parameters like VPN routing, protocol preferences, and client settings.
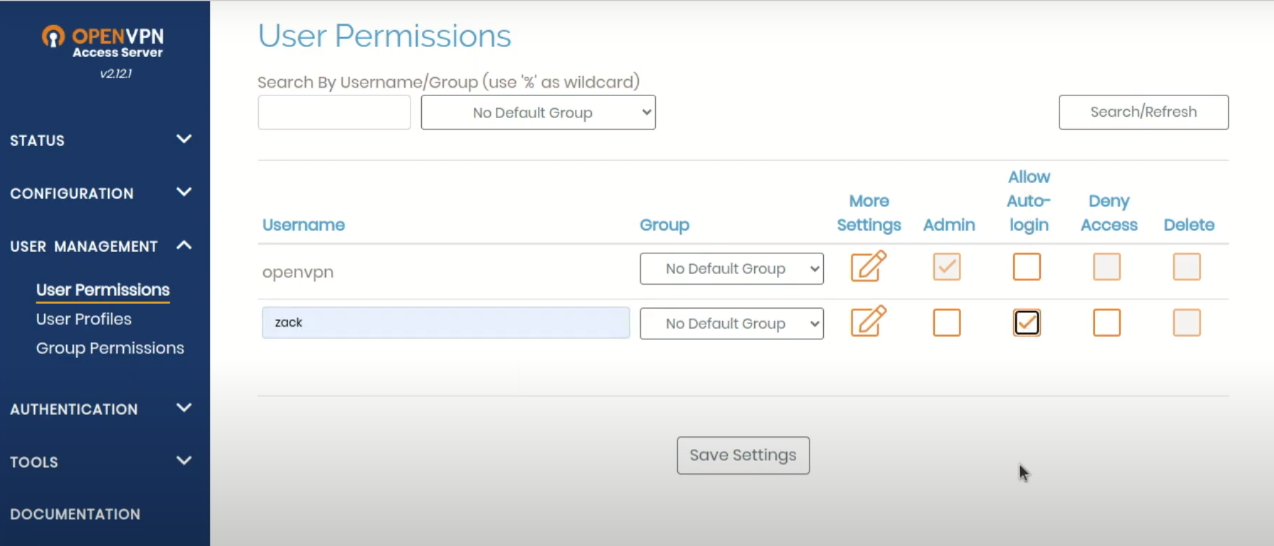
- User Management: You can add, delete, or modify user accounts under User Management. These are the credentials the users will use to connect to the VPN. Click the More Settings button to set a password for the new user.
For most users the default settings are sufficient.
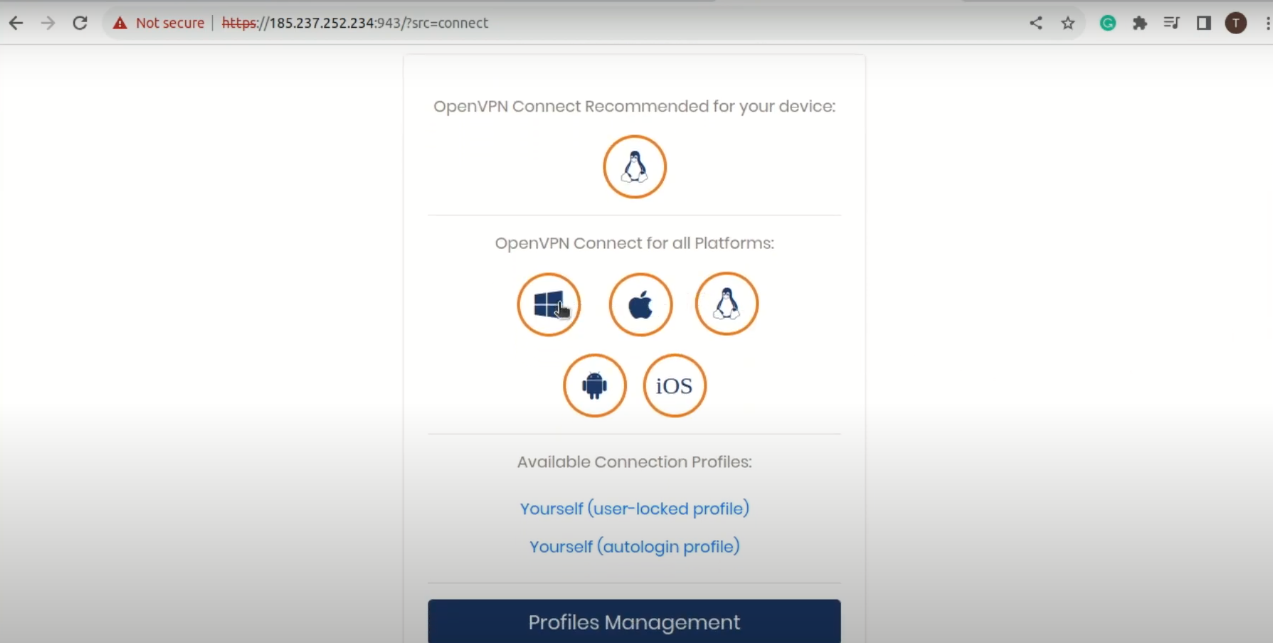
Step 7: Download Client Software
To connect to your VPN, users will need the OpenVPN Connect client. It can be downloaded from:
https://your_server_ip_or_domain_name:943
Once there, users can log in and download the client specific for their operating system.
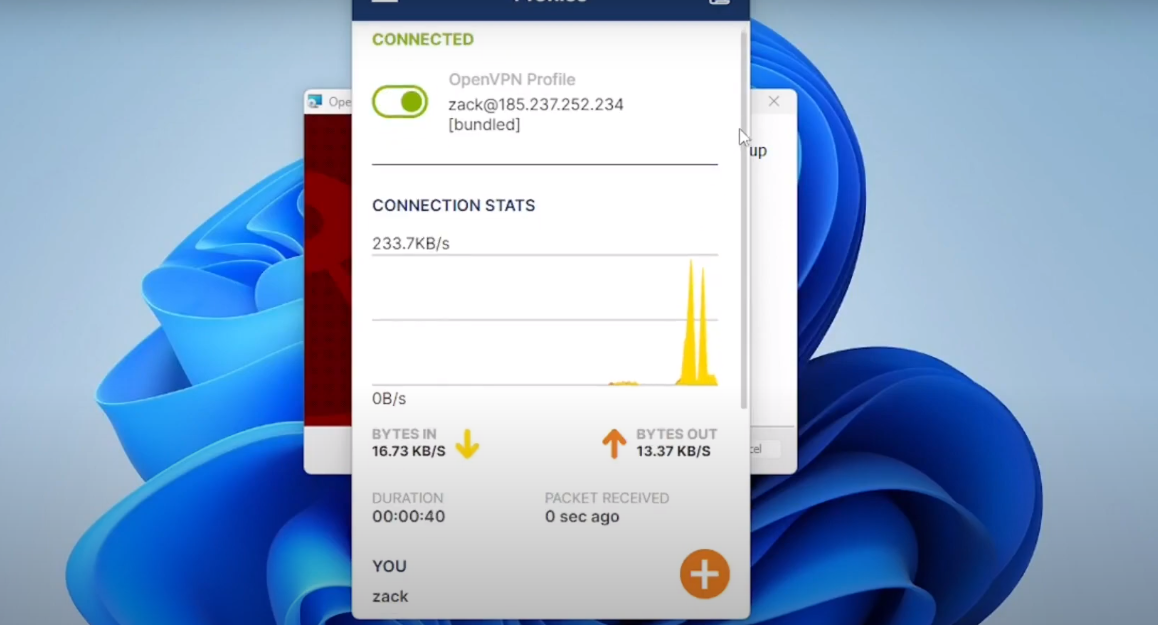
Step 7: Connect to the VPN
After downloading and installing the OpenVPN Connect client, users can simply automatically connect to the server. They will use the credentials you’ve set up in the User Management section of the admin interface.
Installing Let’s Encrypt TLS Certificate for OpenVPN Access Server
To ensure that VPN users don’t encounter security alerts when accessing the OpenVPN Access Client Portal, it’s essential to have a valid TLS certificate. You can acquire one at no cost from Let’s Encrypt.
To ensure that VPN users don’t encounter security alerts when accessing the OpenVPN Access Client Portal, it’s essential to have a valid TLS certificate. You can acquire one at no cost from Let’s Encrypt.
Set up the Certbot client:
sudo apt install certbot
Enable TCP ports 80 and 443:
sudo ufw allow 80/tcp sudo ufw allow 443/tcp
Get your TLS certificate: Ensure you’ve set a DNS A record for your subdomain (like openvpn.example.com).
sudo certbot certonly --standalone --preferred-challenges http --agree-tos --email you@example.com -d openvpn.example.com
Install the acquired certificate:
sudo /usr/local/openvpn_as/scripts/sacli --key "cs.priv_key" --value_file "/etc/letsencrypt/live/openvpn.example.com/privkey.pem" ConfigPut

sudo /usr/local/openvpn_as/scripts/sacli --key "cs.cert" --value_file "/etc/letsencrypt/live/openvpn.example.com/cert.pem" ConfigPut

sudo /usr/local/openvpn_as/scripts/sacli --key "cs.ca_bundle" --value_file "/etc/letsencrypt/live/openvpn.example.com/chain.pem" ConfigPut
Apply the configurations:
sudo /usr/local/openvpn_as/scripts/sacli start sudo systemctl restart openvpnas
With these steps, you’ll seamlessly integrate the Let’s Encrypt TLS certificate into your OpenVPN Access Server.
Conclusion
Installing OpenVPN Access Server on Ubuntu 22.04 can initially seem challenging, but by following the outlined steps systematically, one can ensure a secure and streamlined VPN setup.
Having the added assurance of a valid TLS certificate from Let’s Encrypt only enhances the user experience, eliminating unwanted security prompts.
With the increasing need for robust online security and private networking, OpenVPN offers an invaluable tool for both individual users and businesses. As Ubuntu 22.04 continues to be a preferred platform for many, it’s heartening to know that OpenVPN integration remains both feasible and efficient on this OS.
Always remember to periodically check for updates and maintain best practices to ensure your server stays secure and performs optimally.