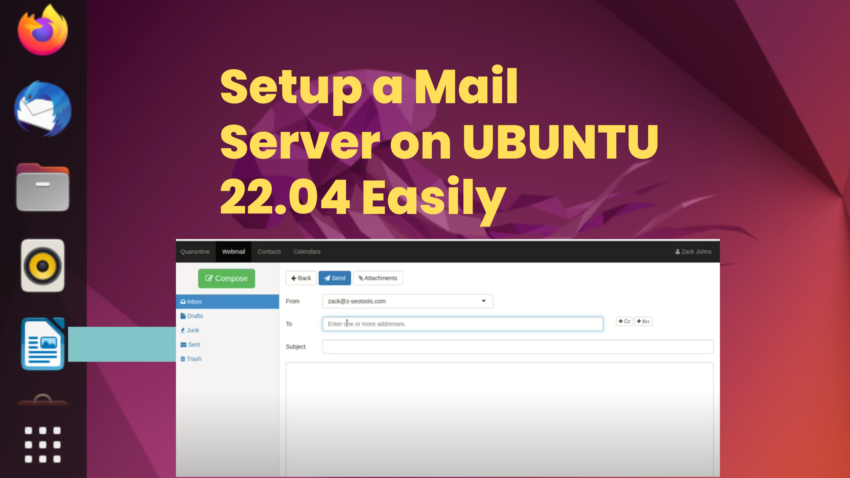
In the realm of digital communication, having a reliable mail server is crucial for businesses and individuals who wish to manage and host their email services. A mail server can be perceived asa virtual postman, facilitating the reception, storage, and delivery of email messages.
In an environment teeming with numerous email hosting services. Having control over your mail server can afford you increased security, flexibility, and customization in managing your emails.
Ubuntu 22.04, being one of the most user-friendly and reliable Linux distributions, serves as a robust foundation for setting up a mail server.
However, the process traditionally involves maneuvering through a plethora of configurations. Settings, and software installations, which could be daunting for many users.
Modoboa
This is where Modoboa steps in, simplifying the intricacies of mail server setup. Modoboa is an open-source mail hosting and management platform, designed to streamline the deployment and administration of a mail server.
It provides an integrated solution, combining several components essential for email services. That is Postfix and Dovecot and wraps them in an intuitive web interface. This makes the management of mailboxes, user aliases, and domain aliases straightforward.
Mail Server on Ubuntu 22.04 using Modoboa
The article that follows will serve as a comprehensive guide. I will walk you through the process of swiftly setting up a mail server on Ubuntu 22.04 using Modoboa.
From system preparation, domain setup, installation of dependencies, to running the Modoboa installer. Each step is outlined in detail, ensuring a smooth setup experience even for those who may be new to mail server deployment.
Whether you’re an individual seeking more control and customization over your email communications or a business looking to foster enhanced security and reliability in your email services. This guide aims to equip you with the knowledge and steps to quickly set up a mail server tailored to your needs, with Ubuntu 22.04 and Modoboa at its core.
Prerequisites: Select an Appropriate Hosting Provider and Acquire a Domain Name
When embarking on the journey to set up a mail server on Ubuntu 22.04 with Modoboa, selecting an appropriate hosting provider and purchasing a domain name are pivotal initial steps.
The hosting provider is crucial as it affects the server’s performance, reliability, and security, all of which are paramount for the seamless operation of a mail server. Opt for a hosting provider like Contabo. that offers Ubuntu 22.04 support. Also assess the provider’s reputation, uptime, support, and scalability to ensure they align with your needs.
Various VPS providers, including DigitalOcean, have port 25 blocked, and in the case of DigitalOcean, requests to unblock port 25 are not entertained. Consequently, establishing an SMTP relay becomes imperative to circumvent the block, incurring additional expenses.
Conversely, opting for Contabo VPS ensures that you don’t encounter this hurdle as port 25 is unblocked by default.
Concurrently, purchasing a domain name, that will serve as the address for your mail server, is indispensable. Choose a domain name that is succinct, easy to remember, and reflects your brand or personal identity.
I secured my domain name through NameCheap. They offer competitive pricing and provide complimentary Whois privacy protection for the duration of the domain’s life.
This combination of the right hosting provider and a suitable domain name lays the foundational stone, paving the way for a smooth and quick setup of a mail server using Modoboa on Ubuntu 22.04.
Setting Up DNS MX Record
Creating a DNS Mail Exchange (MX) record is a pivotal step in the process of setting up a mail server. An MX Record directs email messages to be routed through your domain to the correct mail server.
The MX record also identifies the server that should receive email for the domain and assigns a preference value for mail delivery if multiple mail servers are available.
To create an MX record, you first need to access the DNS management interface provided by your domain registrar or DNS hosting provider. Within this interface, you would typically select the domain you are working with.
Navigate to the DNS settings or DNS management page. Find the option to add a new record. Once there, you will select ‘MX’ as the record type and enter the necessary details.
The essential components of an MX record include the Priority and the Destination. The Priority is a number that specifies the precedence of the mail server. Lower numbers denote higher priority.
The Destination is the domain name of the mail server that will receive the emails for your domain. After entering these details, save the changes.
It is crucial to ensure that the details, especially the destination, are entered correctly. Also verify the MX record post-creation, as improper configuration can lead to the misrouting or loss of emails.
After setting up the MX record. It may take some time, usually up to 48 hours, for the changes to propagate across the internet.

Configure a Mail Server on Ubuntu 22.04 Using the Modoboa Installer
Log into your VPS using an SSH client like Putty. If you are on a Linux machine you can log in using the terminal.
SSH, or Secure Shell, is a protocol used to securely log onto remote systems. You can use the ssh command in the Linux terminal to connect to another system.
ssh [user]@[hostname or IP address]
- [user] is the username you want to log in as.
- [hostname or IP address] is the address of the system you want to connect to.
After you log in, always ensure your system is up-to-date:
sudo apt update && sudo apt upgrade -y
Install Required Dependencies
Modoboa has a number of dependencies that can be installed using:
sudo apt-get install -y git python3-virtualenv python3-pip
Use the Modoboa Installer
To simplify the process, Modoboa provides an installer script:
git clone https://github.com/modoboa/modoboa-installer
Next, move to the modoboa-installer directory and generate a configuration file. Substitute example.com with your specific domain name.
cd modoboa-installer sudo ./run.py –stop-after-configfile-check example.com

Edit the installer.cfg configuration file using your favorite text editor, for example, nano:
sudo nano installer.cfg
To secure a legitimate TLS certificate from Let’s Encrypt for your mail server, modify the value of type from self-signed to letsencrypt within the [certificate] section. Also change the email address to your own.

By default, the Modoboa installer is configured to set up a PostgreSQL database server, as evidenced by the corresponding lines in the configuration file.

Should you prefer to utilize MariaDB as the database server, alter the engine from postgres to mysql. In this instance, Modoboa will proceed to install MariaDB in place of MySQL.

After you are done making changes you can save the file and exit. Hit `Ctrl+O` and then press `Enter` to validate your choice. To close, press `Ctrl+X`.
Subsequently, it is recommended to employ a Fully Qualified Domain Name (FQDN) as the hostname for your mail server, for instance, mail.example.com. Execute the ensuing command to establish the hostname.
sudo hostnamectl set-hostname mail.example.com
You can now run the installer. Before you do that make sure DNS records are propagated to the Internet. You can use a tool like
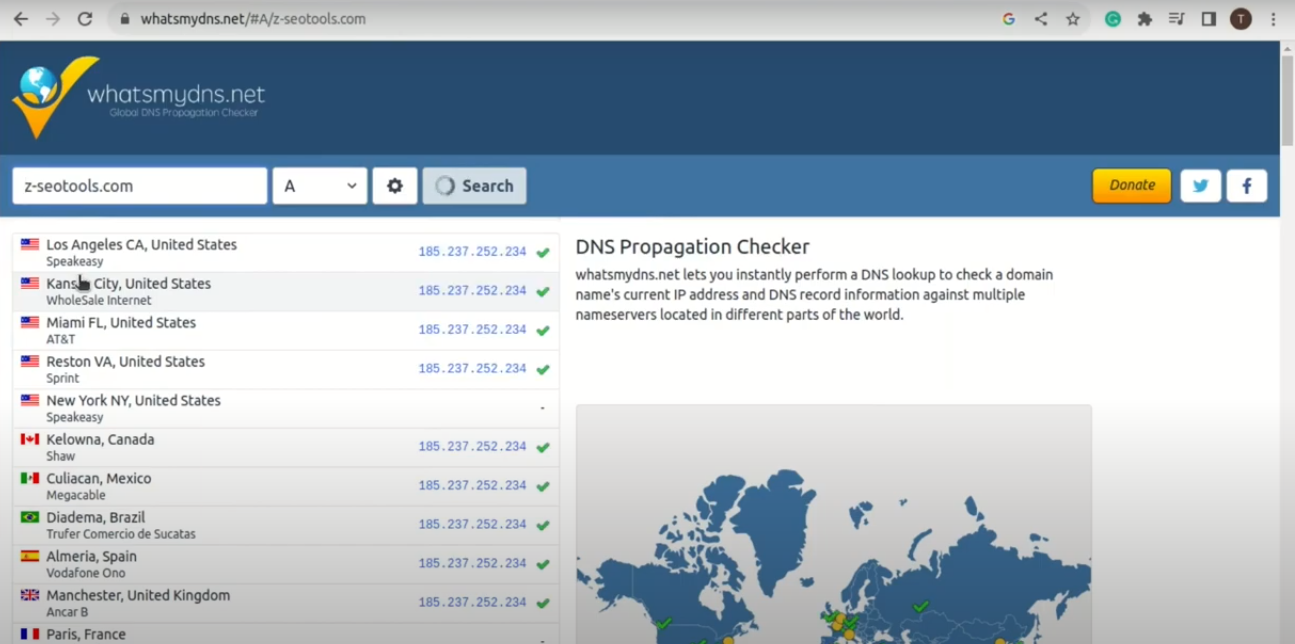
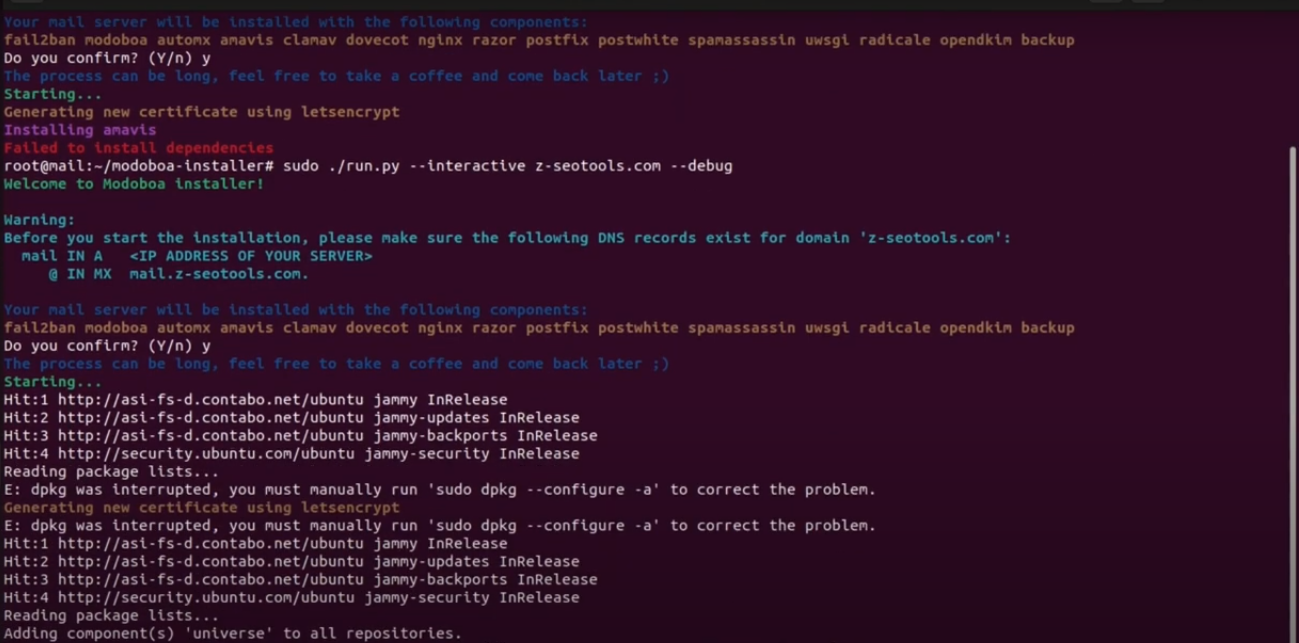
If everything is ok run the following command to start the installation of Modoboa. Replace example.com with your own domain. The installation can take some time so be patient. Once the installation is done restart the server.
sudo ./run.py –interactive example.com
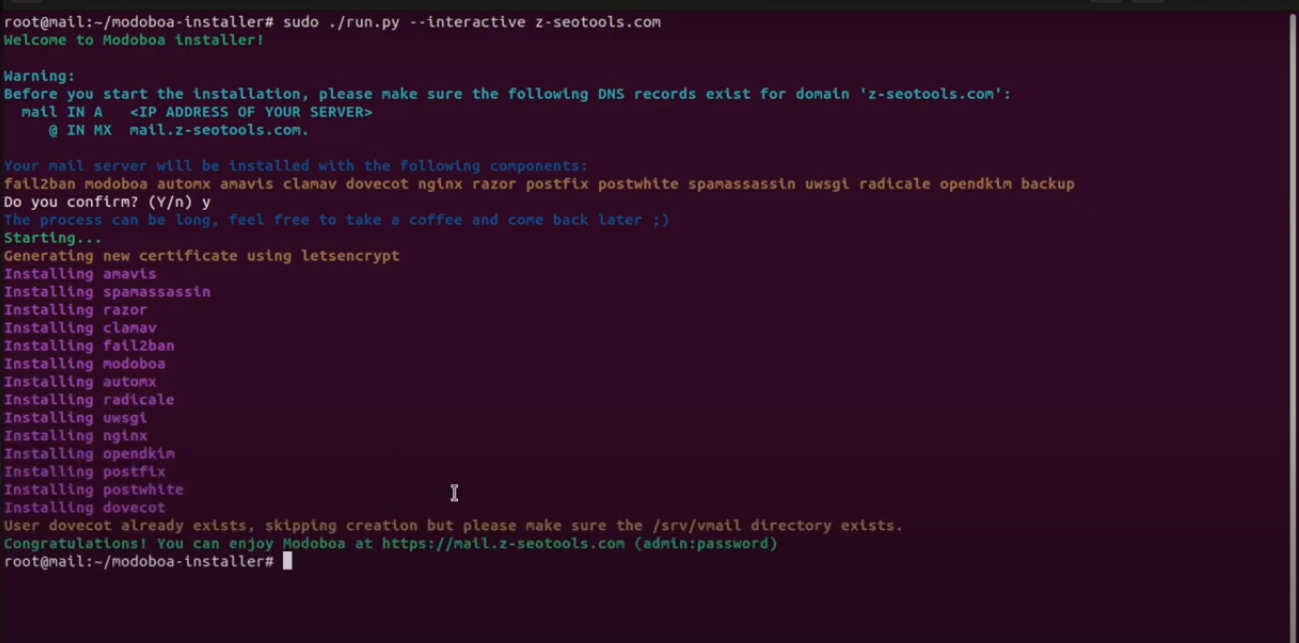
Should an error occur during the installation, leveraging the `–debug` option will enable you to view more comprehensive output details.
sudo ./run.py –interactive –debug example.com
Access Modoboa Web Interface
Once everything is set up, access the Modoboa web interface by navigating to:
https://mail.yourdomain.com
You should see the Modoboa login page. The default credentials are:
Username: admin
Password: password
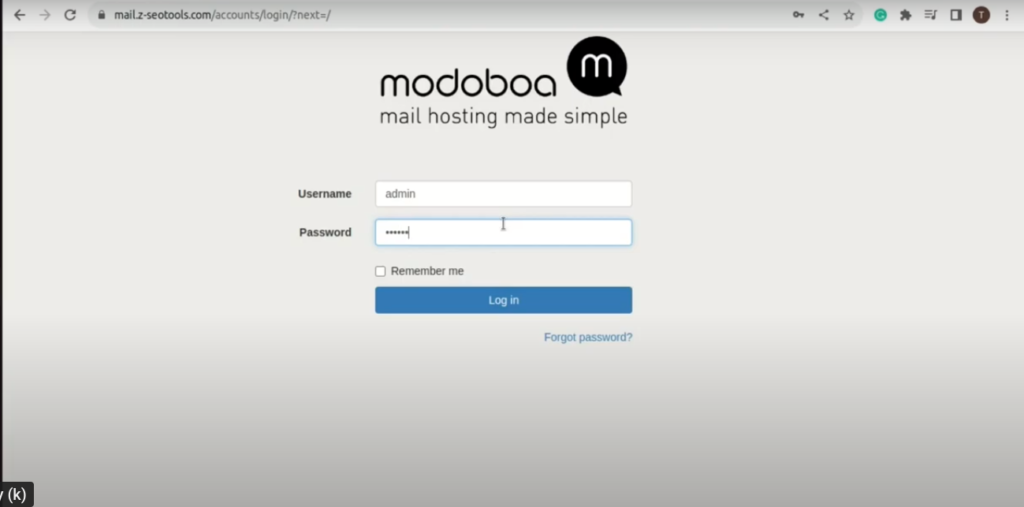
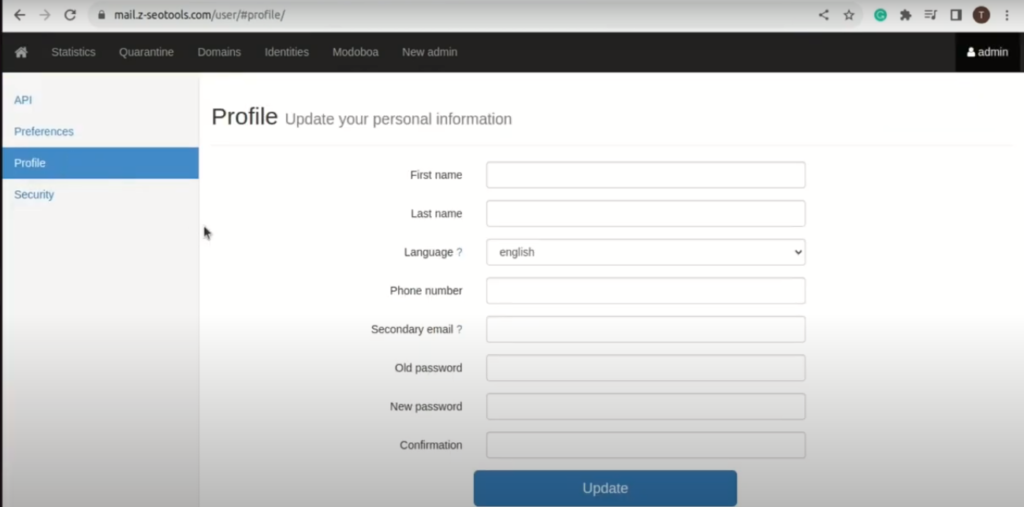
Make sure to change the default password immediately after logging in! Go to Admin -> Settings -> Profile to change the password.
Additional Configurations
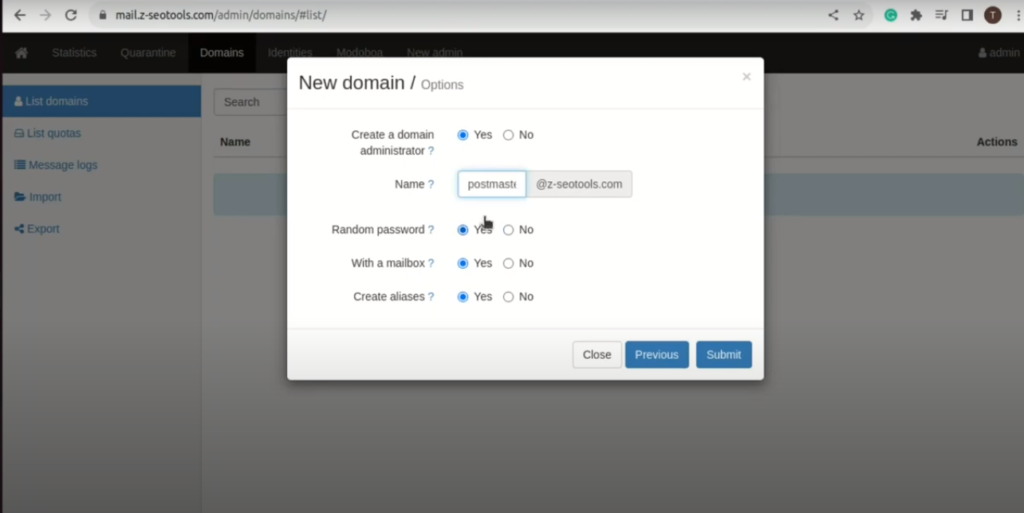
Go to Domains and add your domain. Enabling DKIM signing is strongly advised as it can significantly aid in enhancing the reputation of your domain.
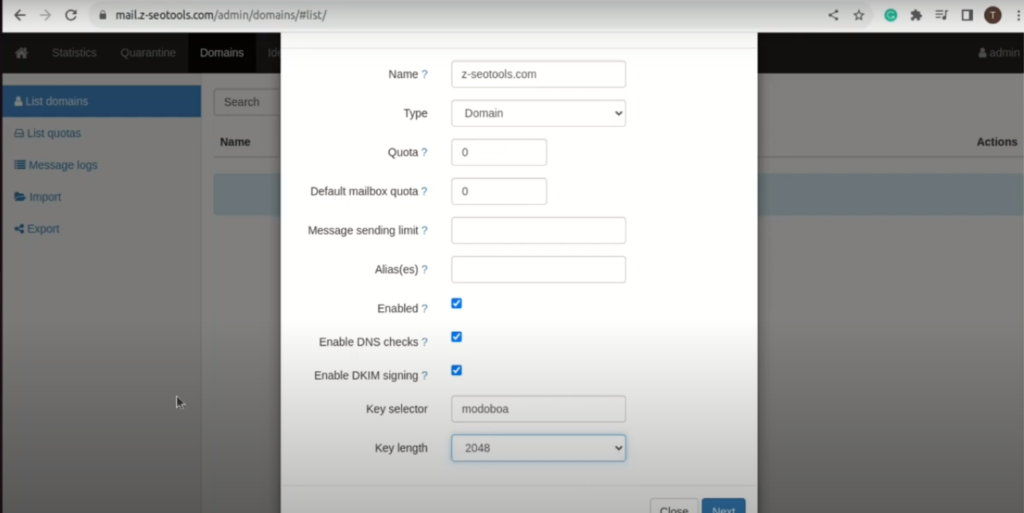
In the subsequent screen, you have the option to establish an admin account for your domain. The SMTP protocol mandates that a mail server must possess a postmaster@example.com address.
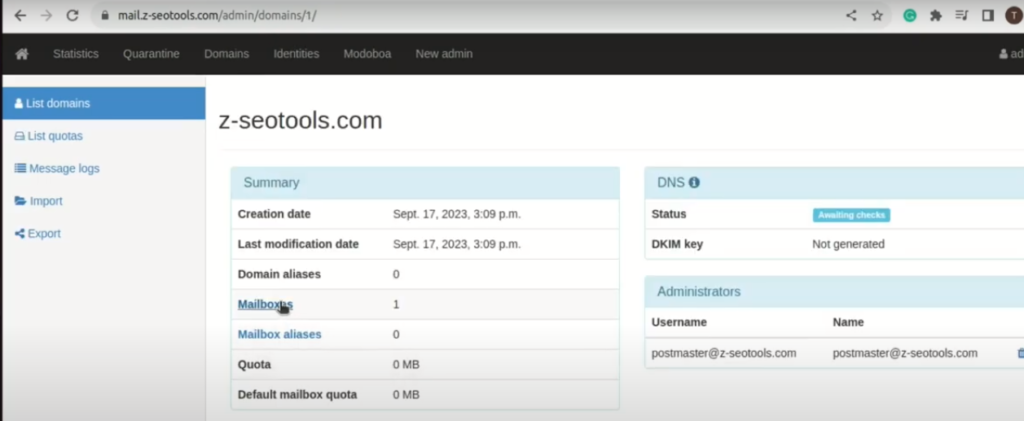
The domain is now added as shown below. To add email addresses or users click on it.

Click on mailboxes to start adding email addresses
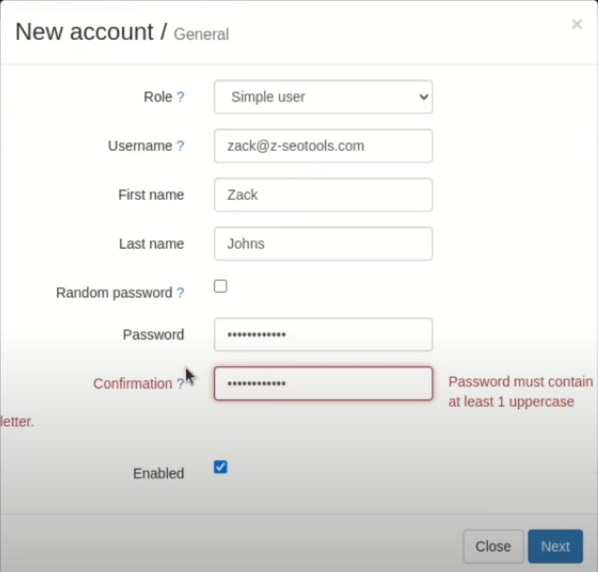
When the window shown below opens click on “Add” then “Account” to add an email address.

Next, select ‘Simple user’ as the role. Input an email address in the ‘Username’ field and provide a password.
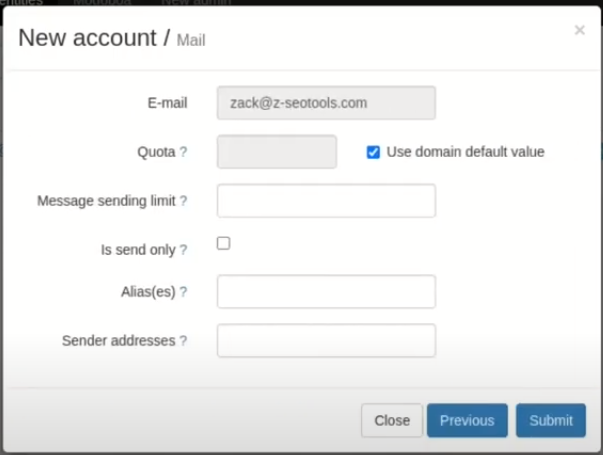
On the following screen, you have the option to create an alias for this email address, if desired.
Send Test Email Using Webmail
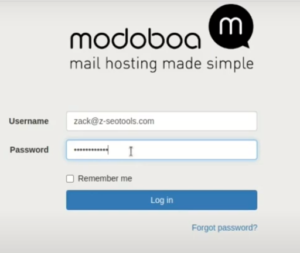
To access the webmail, it is necessary to first log out of the admin account and then input the user credentials.
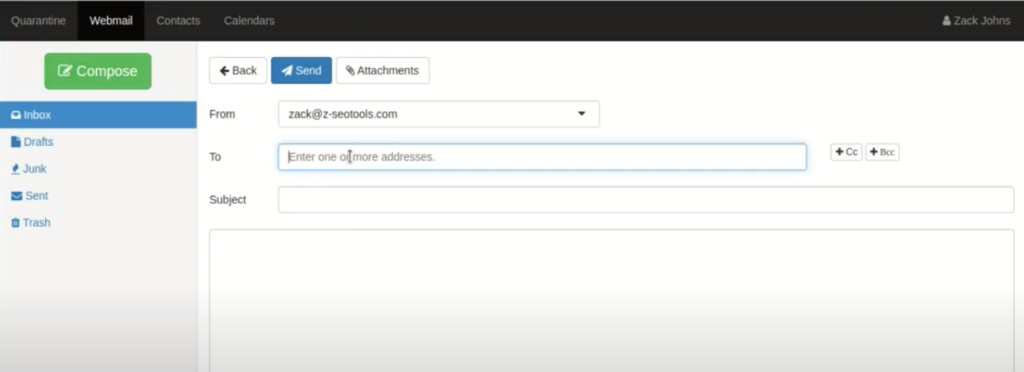
Click on webmail then compose an email. Send it to a public email address like Gmail or yahoo and see if you will receive the email. If you do receive the email it means you are able to send email.
Next, send an email from your Gmail or any other email address to your Modoboa email account. If you receive the email it means your server is able to receive emails.
Solutions If you can not send Emails
If you encounter the below-mentioned error in the /var/log/mail.log file, it signifies that the policy daemon is not operational.
postfix/smtpd[229906]: warning: connect to 127.0.0.1:9999: Connection refused
postfix/smtpd[229906]: warning: problem talking to server 127.0.0.1:9999: Connection refused
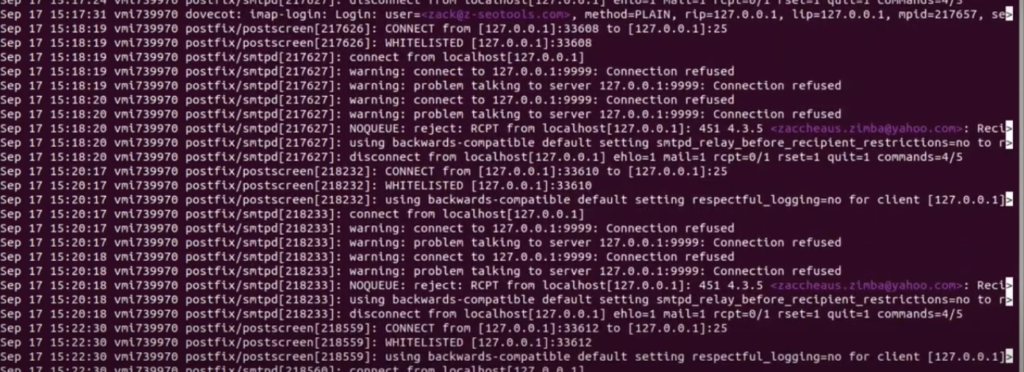
You can attempt to restart it by executing the command below.
sudo systemctl restart supervisor
Next, verify whether the policy daemon is active and listening on port 9999.
sudo ss -lnpt | grep 9999
If it continues not to listen on port 9999, you will then need to deactivate the policy daemon in Postfix.
sudo nano /etc/postfix/main.cf
Look for the following line

Disable the check_policy_service directive as shown below.

Save and close the file. Then restart Postfix.
sudo systemctl restart postfix
Also, check if port 25 is open by running this command. If you are using a Contabo VPS you are assured that port 25 is open
telnet gmail-smtp-in.l.google.com 25

Utilizing Mail Clients on Your Desktop or Portable Device
Setting up a mail client like Mozilla Thunderbird on your computer or mobile device involves a series of steps to ensure it correctly connects to your mail server. Here is a generalized guide on how you can do this:
Luckily Thunderbird or Outlook will attempt to find the settings automatically as shown below. No need for manual configurations
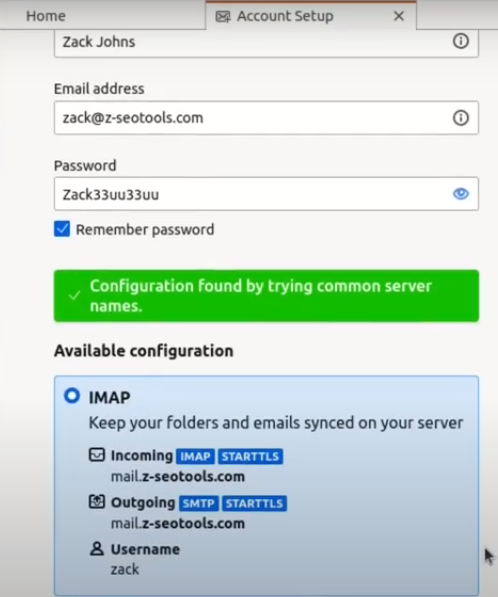
For manual configurations just do this;
In the section for the incoming server, opt for the IMAP protocol, input mail.your-domain.com for the server name, select port 143, and choose STARTTLS.
For the authentication method, select a normal password. For the outgoing server section, choose the SMTP protocol, designate mail.your-domain.com as the server name, opt for port 587 and STARTTLS. Utilize a normal password for the authentication method.
Enhancing Email Delivery Success
Improving email delivery success, often referred to as email deliverability, is crucial for ensuring that your emails reach the recipient’s inbox and don’t end up in the spam or junk folder. Here are some strategies to enhance email delivery success:
SPF (Sender Policy Framework):
Deploy SPF records in your domain’s DNS to specify which IP addresses are authorized to send emails on behalf of your domain. Put the IP address of your VPS server.

- TXT indicates this is a TXT record.
v=spf1: This signifies the start of the SPF record and declares the SPF version used, which is typically version 1.- IP Addresses/CIDR Notation: Specifying IP addresses (e.g.,
ip4:192.168.1.1) or CIDR notations (e.g.,ip4:192.168.1.0/24) allow emails from the specified IP addresses or IP ranges. ~allsignifies that emails purportedly from your domain should exclusively originate from hosts delineated in the SPF record. Emails emanating from any other hosts will be marked as potentially deceptive or forged.
DKIM (DomainKeys Identified Mail):
Implement DKIM to sign your emails cryptographically, verifying that the email has not been altered during transit.
Earlier, while configuring the domain name in the Modoboa admin panel, we activated DKIM signing, ensuring that the signing aspect is managed. Now, all that remains is to create a DKIM record in the DNS manager. Start by navigating to the Modoboa admin panel and choosing your domain name. Within the DNS segment, click on the “Show key” button.
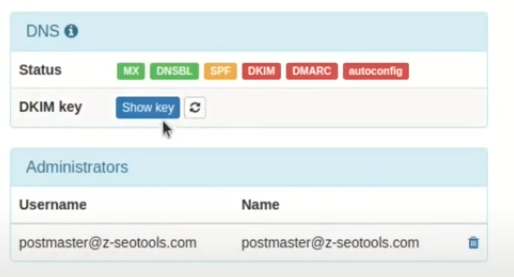
The public key will be displayed, available in two formats. We require only the Bind/named format.
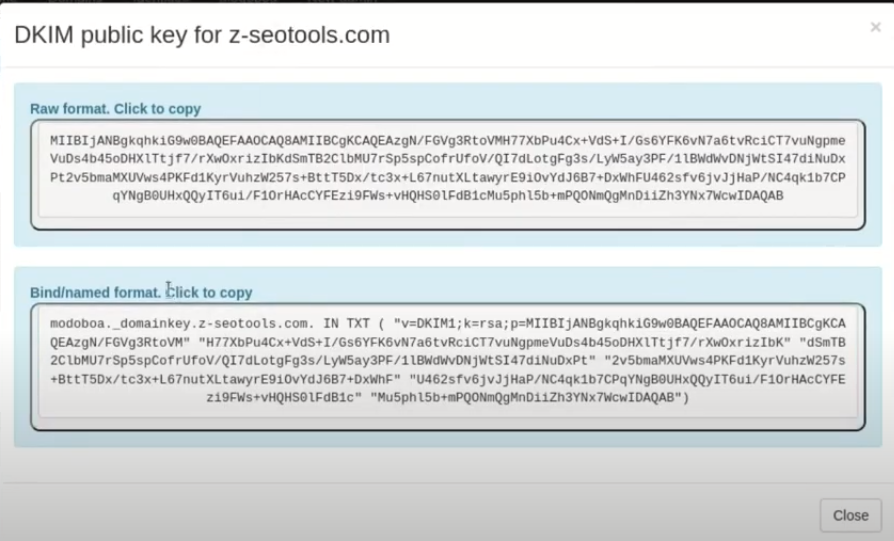
Navigate to your DNS manager, establish a TXT record, and input modoboa._domainkey into the Name field. Copy all the content within the parentheses and insert it into the value field, removing all double quotes.

DMARC (Domain-based Message Authentication, Reporting, and Conformance):
Set up DMARC records to instruct the receiving server on how to handle emails that fail SPF or DKIM checks.
v=DMARC1; p=none; pct=100; rua=mailto:dmarc-reports@your-domain.com

Evaluating Email Score and Delivery Position

Testing your email score and placement can significantly enhance your email deliverability, ensuring that your emails don’t land in the spam folder. One popular tool for this is Mail-Tester (https://www.mail-tester.com). Here’s how to use it:
Step 1: Visit Mail-Tester Website
- Open your web browser and navigate to Mail-Tester.
Step 2: Copy the Provided Email Address
- Once on the site, you will see a unique email address generated for you. Copy this address.
Step 3: Send an Email
- Send a test email from your email client or email-sending platform to the copied email address. This email should be representative of the emails you usually send, containing similar content, format, and any links or images.
Step 4: Analyze the Score
- Return to the Mail-Tester webpage and click on “Then check your score.”
- Mail-Tester will analyze your email against several criteria and provide a score out of 10. The higher the score, the better the email deliverability.
Step 5: Review the Details
- Carefully review the detailed feedback provided by Mail-Tester, which may include information about your SPF, DKIM, and DMARC configurations, content analysis, and whether your server is on any blacklists.
Step 6: Make Necessary Adjustments
- Based on the feedback, make any necessary adjustments to your email content, HTML structure, or server configurations to improve your score.
- If issues like SPF, DKIM, or DMARC failures are reported, adjust your DNS records accordingly.
Step 7: Retest
- After making the necessary adjustments, retest your email by sending another email to a new unique address provided by Mail-Tester.
- Repeat this process until you achieve a satisfactory score.
Step 8: Monitor Regularly
- Regularly test your emails using Mail-Tester or similar tools to ensure continued compliance with best practices and to address any new issues that may arise over time.
Reminder:
Mail-Tester is a useful tool to get quick insights into your email deliverability, but achieving a perfect score does not guarantee your emails will never be marked as spam. Regularly monitoring engagement metrics like open rates, click-through rates, and bounce rates is also crucial for maintaining high email deliverability.
Video: How to Install and Configure Mail Server in Ubuntu 22.04 (EASILY)
Conclusion
Setting up a mail server on Ubuntu 22.04 with Modoboa is straightforward, thanks to the automation provided by the Modoboa installer.
With the right configurations and security practices, you’ll have a robust mail server in no time. Always ensure to keep your system and Modoboa installation updated to stay protected against potential vulnerabilities.
