This tutorial will show you how to create a free website using Blogger also known as Blogspot without having to pay for a domain name or web hosting. Blogger lets you build a site that looks polished and well-designed.
Beginners will benefit much from this guide. I’ll take you step by step through the process, illustrating everything with plenty of pictures.
Without further ado, let us begin.
How to Create a Free Website With Blogger or Blogspot
Signing Up for Blogger
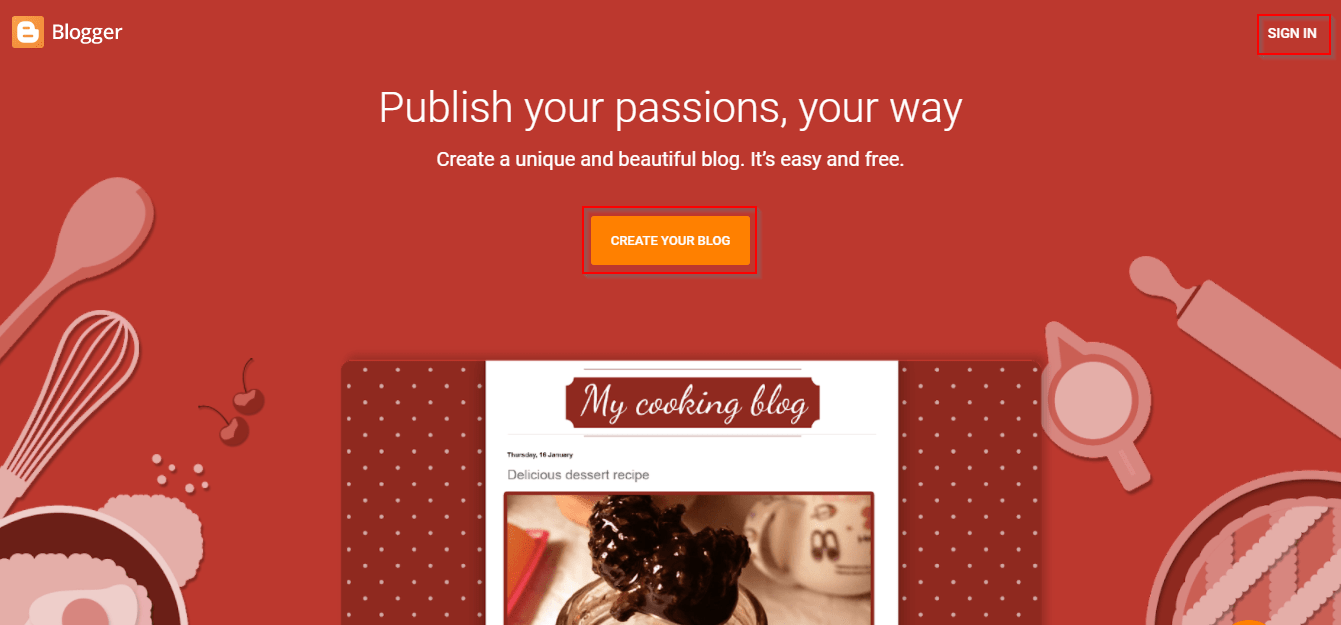
To begin, if you haven’t already, you’ll need to create a Google Account. Blogger is a service provided by Google that is why a gmail account is required. If you do, navigate to Blogger.com and sign in with your Google credentials to gain access to all of Google’s free tools.
Enter the Website’s Title and Domain name
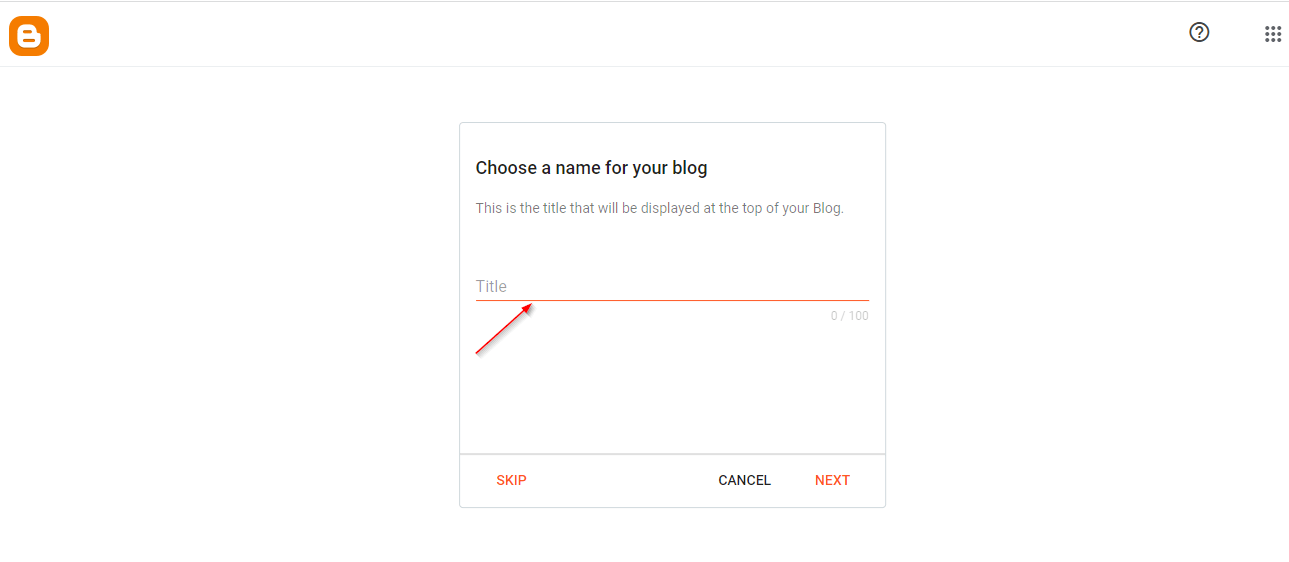
Upon logging in to Blogger, you will get a page similar to the one seen below. Create a blog with a name that best reflects your personality or business. Enter the title you want then click on “NEXT.”
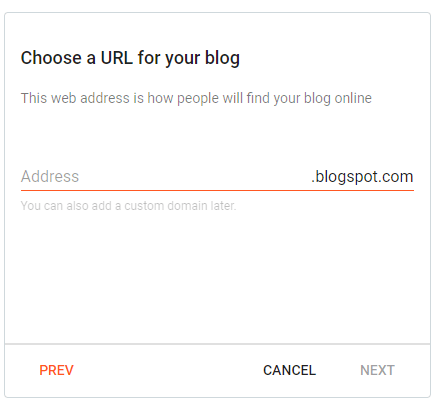
Please include the title and URL of your website. For instance, if you want to create a website about vintage automobiles, your address (also known as your domain name or your website’s URL) may be classiccars.blogspot.com and your title could be Best Classic Cars Blog. You should be aware that because these domain names are free, they will automatically be suffixed with blogspot.com. Blogspot also allows for the creation of custom domain names, which we will cover later in this article.
Install a Theme
In the Blogger dashboard, click on “Theme” on the left-hand side of the page after you have set up your blog with the domain name of your choice. You can use a template that comes with Blogger or you can install your own. Theme Forest, WebLyb, and Blogger Templates are just a handful of the places where you may find Blogger templates. There are both free and paid alternatives to pick from.
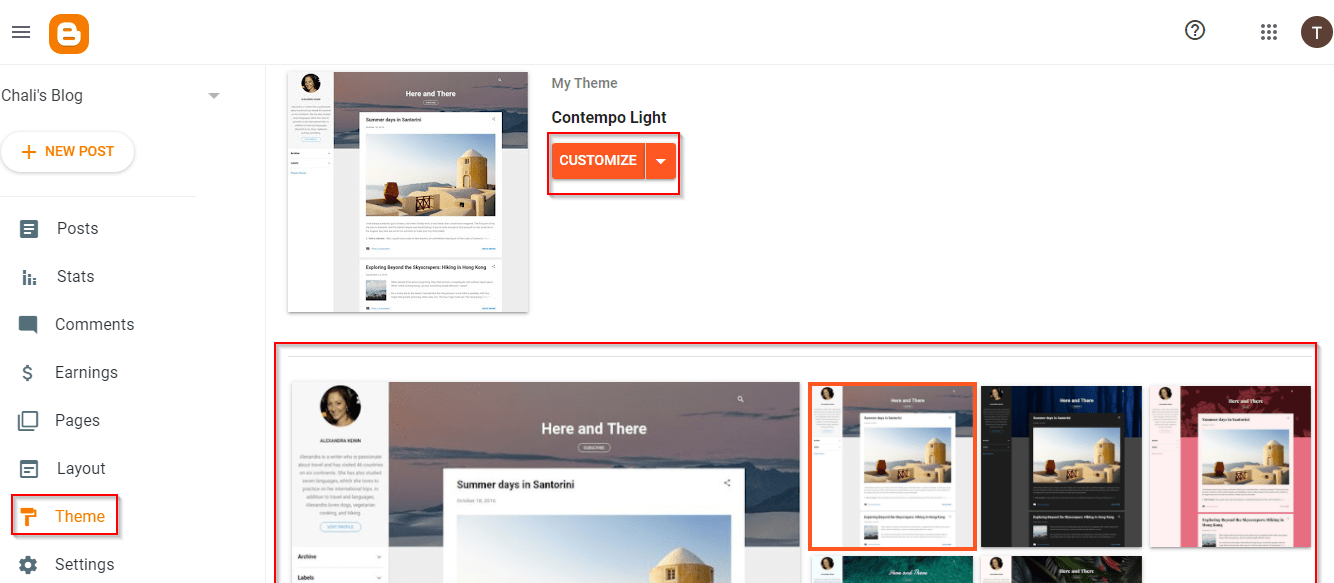
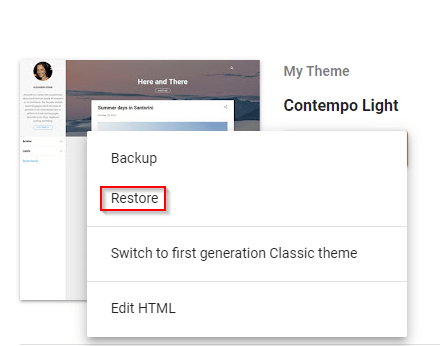
You can download a theme for your free Blogger website and upload it. To achieve this do the following.
- Download a Blogger theme say from Theme Forest
- Go to the ‘Theme’ section
- Click on the down arrow on the ‘Customize’ button
- Click on “Restore’
- You can then upload your Theme
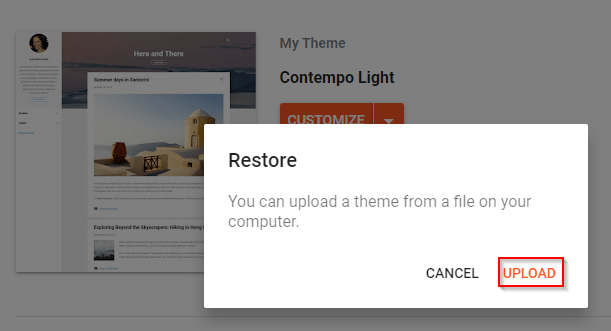
The ‘Customize’ button allows you to make changes to any existing theme.
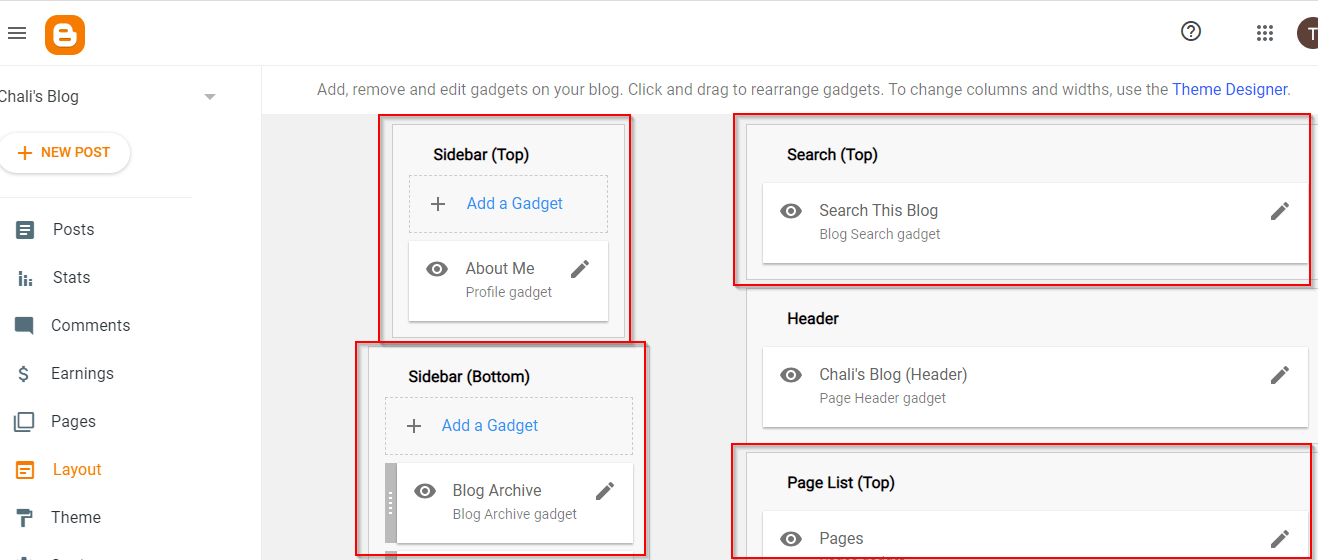
In the Layout section, on the left side of the dashboard, you can edit the layout of the theme. The layout will depend on the Theme you apply. For example how many sidebars etc.
Create Your Own Logo and Favicon
Blogger’s logo will, of course, be the default. Make your Blogger site look more professional by uploading your logo and favicon.
It’s important to have a logo that reflects your company and identity. An effective logo must be able to convey your products, your vision, and your mission all at once. Having a distinctive logo might help you stand out in a crowd of similar businesses.
To achieve this follow these steps.
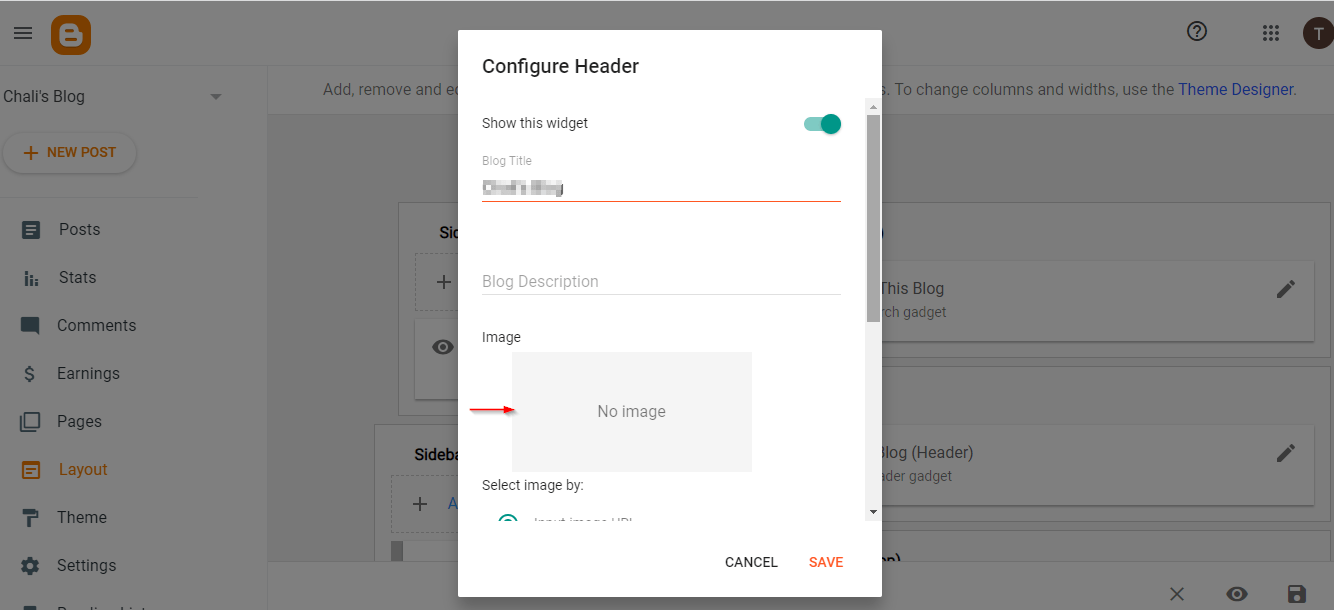
- Go to ‘Layout’ from the dashboard and click on ‘Header’
- Upload Logo in the ‘image’ section.
The favicon is a little square graphic that is used to identify a website in web browsers like the ones shown below for YouTube and Blogger.
![]()
Favicons are a great small feature that should not be ignored. Makes your website stand out from all the other tabs in the browser and demonstrates that you care about its appearance.
To add one go to the Layout section on your Blogger dashboard and click on ‘Settings’. Scroll down and click on ‘Favicon’. Select a file and ‘Save’ your Favicon.
![]()
You can use Canva to design your Logo and Favicon.
Add Important Pages
Your website style and favicon have been fine-tuned, so it’s time to move on to the pages. If you want a professional-looking website, you’ll need to include the following pages: Home; About Us; FAQ; Privacy; Terms of Use; Contact; and so on.
To create a new page to your Blogger site, follow these steps:
- Go to ‘Pages’ in the Blogger dashboard
- Click on New Page
- Enter the Page’s title
- Add relevant information to it then preview or publish it
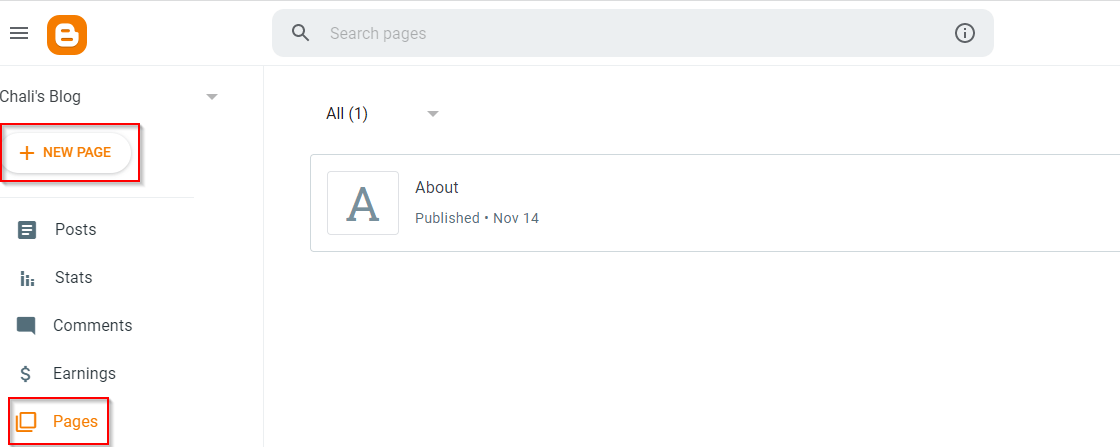
To configure the page list you have created go to layout then edit the page list (This will depend on the Theme you have installed)
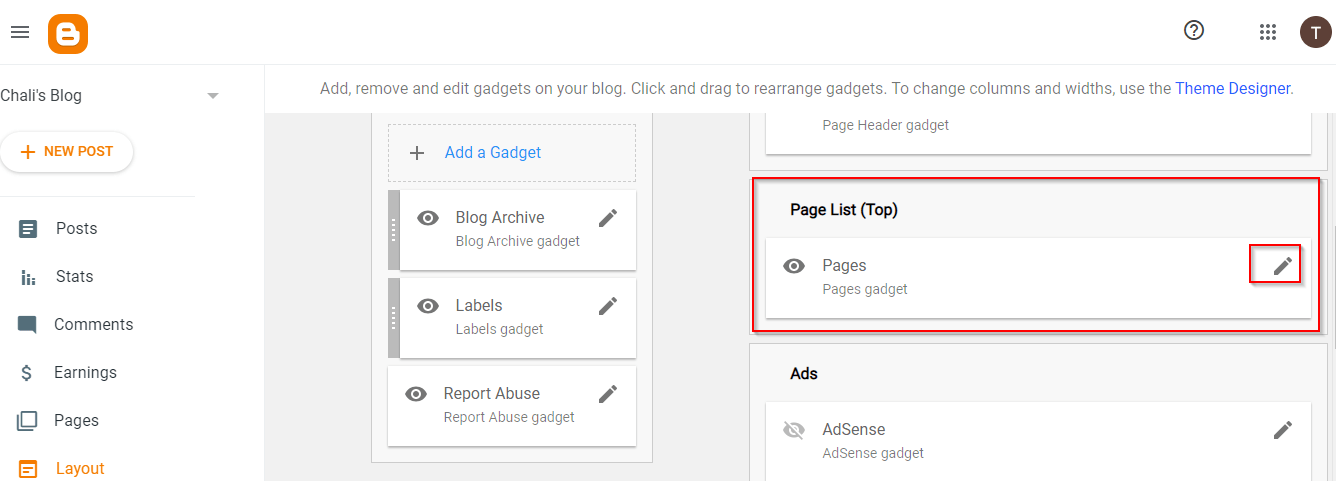
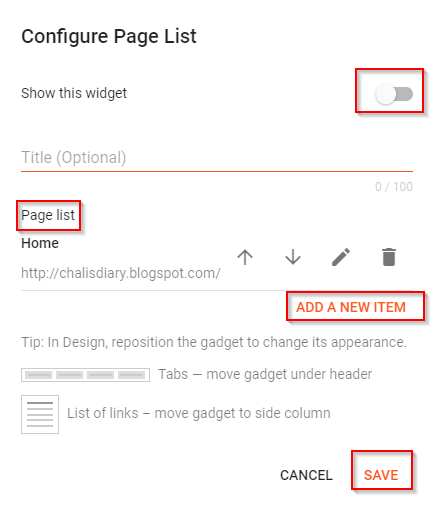
When you click on the edit page list a window like the one below will pop up where you can add the list of pages you have created even arrange them according to what you want. Don’t forget to enable the widget.
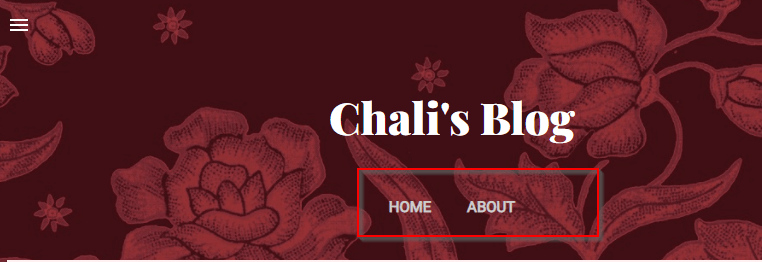
When you are done editing the pages will appear on your homepage like in the screenshot below.
The top menu, left sidebar, and right sidebar are all places where a link to an important page might be placed. To add pages to the sidebar, click Add a Gadget.
Start Adding Posts
Once your free Blogger website is done, you can begin adding content. Include featured images. You can create awesome featured images using Canva.
Go to ‘Posts’ on the left side of the Blogger Dashboard to create posts.
Add a Custom Domain
As soon as you sign up for Blogger, your website’s URL will include a subdomain – blogspot.com. For example, if you want bestclassiccars as your site’s URL, it will instead be bestclassiccars.blogspot.com.
The subdomain can be removed if you buy a domain for example at Bluehost.com. Ensure that your domain name is available before purchasing it.
To add your custom domain follow these instructions;
- Proceed to ‘Settings’
- Click on ‘Custom Domain’
- Add your custom domain and click ‘Save.’
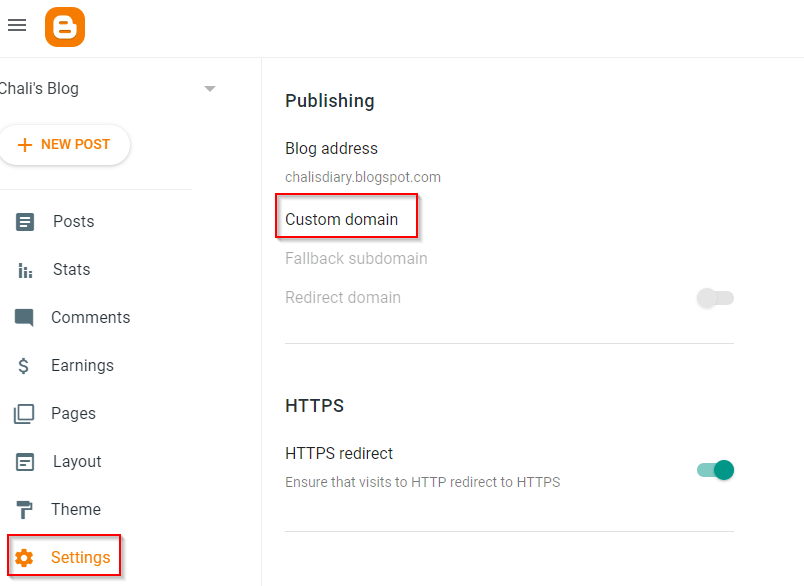
When you add a custom domain name to your Blogger account, the Blogger will tell you to change the DNS settings. Change the DNS settings on Bluehost for example if you purchased your domain there to those for Blogger.
How you can Earn Money from your free Website or Blog
There are many different ways to make money from a website. Let’s check them out.
Affiliate Marketing
After acquiring a significant number of users, you may begin promoting your site through affiliate marketing programs with Amazon for example or you can join an affiliate marketing network like ShareASale. It’s the same as having a product promotion on your website. If somebody purchases a product after clicking on one of your links, you will receive a commission. The corporation will provide you with a share of the product’s sales.
- Log into your Affiliate marketing network like ShareASale
- Copy the code of any affiliate banner
- Add a widget and place it wherever you want the banner to show up.
- Paste your banner’s code into the widget.
For example, if you want a banner to appear on the Sidebar go to ‘Layout’ as shown below.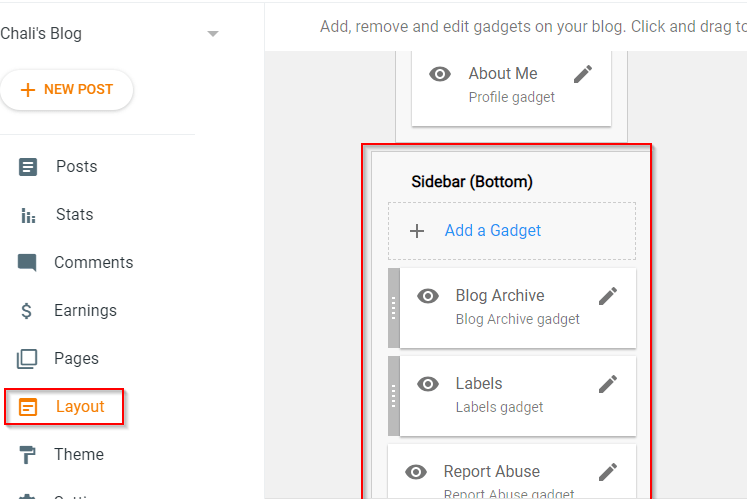
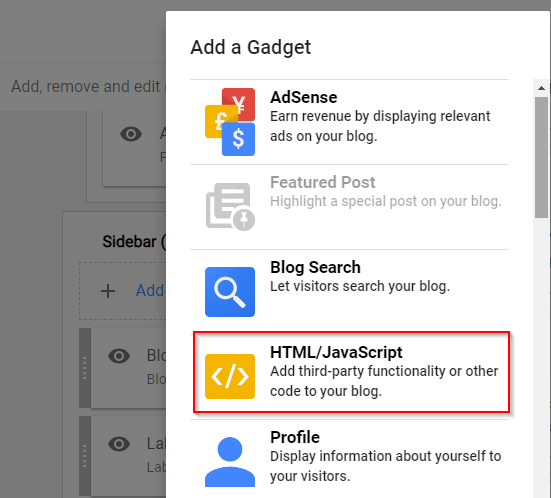
Add a Gadget and select HTML/JavaScript. Give it a title and paste your code. The banner will start appearing in your Sidebar.
Google AdSense
It goes without saying that Google Ads are the most straightforward method of generating income from a website. When you begin to receive a significant quantity of traffic to your website, you can submit an application for Google AdSense. If your Adsense account is approved, you will be able to begin making money right away.
You can add an Adsense widget anywhere you want.
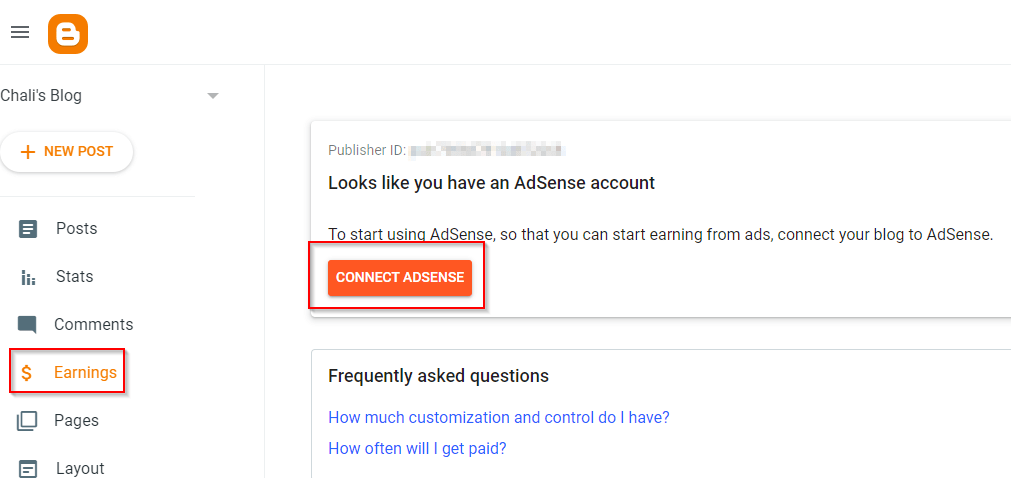
AdSense gadgets cannot be configured until an AdSense account has been established in the Earnings tab.
Summary: How to Create a Free Website With Blogspot in 2022
- Create a Google Account and sign in to Blogger
- Invest in a domain. Instead of using Blogger’s subdomain, use your own domain.
- Create your own logo and favicon. Design your own brand identity.
- Make changes to the template to suit your needs. Use a template that’s most suited to your industry. You want to make the template stand out from the rest.
- Create Important Pages
- Create Posts
- Monetize your site
