Virtualization is an essential tool for developers, IT professionals, and even tech enthusiasts. It enables users to simulate multiple computer systems on a single physical machine, thereby allowing for testing, development, and even server consolidation.
Qemu/KVM and Virt-Manager are two key pieces in the Linux virtualization puzzle.
Qemu/KVM (Kernel-based Virtual Machine) is a combination of two components:
- QEMU is a generic and open-source machine emulator and virtualizer. It can run OSes and programs made for one machine (e.g., an ARM board) on a different machine (e.g., an x86 PC).
- KVM is a Linux kernel module that allows the host machine to exploit the virtualization capabilities of modern processors, making the virtualization faster and more efficient.
While Qemu/KVM provides the underlying virtualization engine, managing virtual machines (VMs) through command-line can be daunting for many users.
That’s where Virt-Manager comes into play. Virt-Manager, short for “Virtual Machine Manager”, is a graphical user interface that makes managing VMs on QEMU/KVM simpler and more intuitive.
The combination of QEMU/KVM for robust virtualization and Virt-Manager for easy management creates a compelling virtualization solution suitable for both professional and personal applications.
Prerequisites:
Before delving into the installation process of Qemu/KVM and Virt-Manager on Ubuntu 22.04 LTS, certain prerequisites must be met to ensure a seamless and effective setup.
Firstly, you should be running on an Ubuntu 22.04 LTS system, which provides the latest security and feature updates tailored for long-term stability.
Additionally, the computer’s CPU needs to support hardware virtualization; most modern processors do, but this can be verified by checking for the presence of ‘vmx’ (for Intel CPUs) or ‘svm’ (for AMD CPUs) flags using the egrep -c '(vmx|svm)' /proc/cpuinfo command.
A non-zero output indicates that hardware virtualization is supported. Furthermore, the installation and configuration process will require certain administrative tasks. Hence, the user should possess sudo privileges, granting them the ability to execute commands with administrative rights.
Meeting these prerequisites not only guarantees that the software components can be installed, but it also ensures that they will operate with maximum efficiency and stability.
Steps:
The installation of Qemu/KVM and Virt-Manager on Ubuntu 22.04 LTS can be broken down into a systematic procedure. Here are the detailed steps:
1. Update the System:
To ensure that you have the latest updates and packages, begin by updating your system:
sudo apt update && sudo apt upgrade -y
update: When used with apt, it updates the list of available packages and their versions, but it does not install or upgrade any packages. Essentially, it refreshes the local database of available packages from the repositories defined in /etc/apt/sources.list and /etc/apt/sources.list.d/.
upgrade: When used with apt, it installs the newest versions of all packages currently installed on the system from the sources enumerated in /etc/apt/sources.list and /etc/apt/sources.list.d/. New packages will be installed if required to satisfy dependencies, but existing packages will never be removed.
2. Install QEMU/KVM on Ubuntu 22.04
Install QEMU/KVM by running this command
sudo apt install qemu-kvm libvirt-clients libvirt-daemon-system bridge-utils virtinst libvirt-daemon
The command you provided installs a set of packages that are commonly used for setting up and managing virtual machines on Debian-based Linux distributions using QEMU and KVM. Let’s break down the command and its components:
sudo: This stands for “superuser do”. It allows permitted users to execute a command as the superuser or another user. Running package installations typically requires superuser privileges.apt: This is the package handling utility (Advanced Package Tool) for Debian-based systems.install: When used withapt, it specifies that you want to install the following packages.- The packages:
qemu-kvm: This is the main package for QEMU with KVM support. QEMU is a generic and open source machine emulator and virtualizer. KVM (Kernel-based Virtual Machine) is a full virtualization solution for Linux on x86 hardware containing virtualization extensions. Together, they allow for efficient virtualization on modern hardware.libvirt-clients: This package contains client-side utilities and applications to manage the virtualization capabilities of libvirt. Libvirt is an open-source API, daemon, and management tool for managing platform virtualization.libvirt-daemon-system: This installs the libvirt daemon and its related components, enabling you to manage virtual machines as a system service.bridge-utils: This package provides utilities for configuring the Linux Ethernet bridge. It’s useful for creating a network bridge for virtual machines to communicate with the host system and other VMs.virtinst: This is a set of command-line tools for creating virtual machines. One of its commonly used tools isvirt-install.libvirt-daemon: This is a transitional package which ensures that the appropriate libvirt daemon is installed.
When you run this command, your system will install all of the mentioned packages, which collectively will enable you to set up, run, and manage virtual machines using QEMU/KVM and libvirt. If you’re planning on using virtualization, this set of tools is quite powerful and versatile.
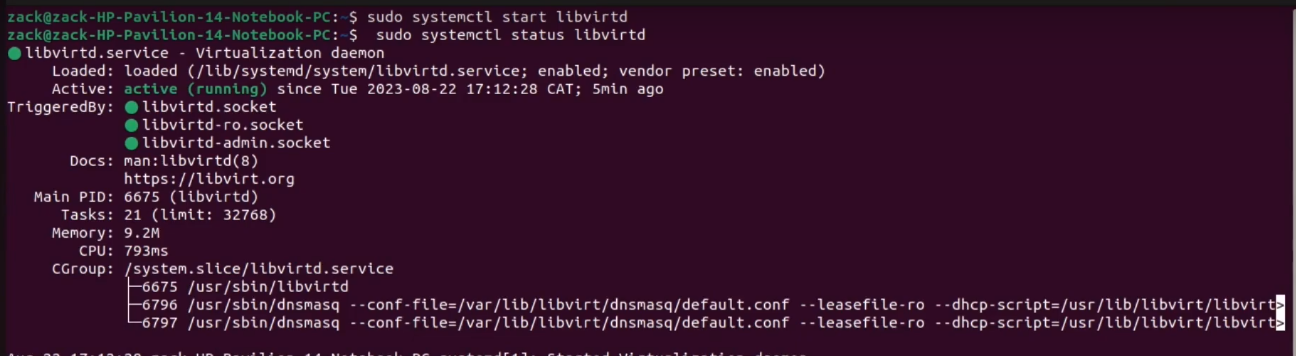
3. Start and Enable the libvirtd Virtualization daemon.
Run the following commands to start the service.
sudo systemctl enable –now libvirtd sudo systemctl start libvirtd
The two commands provided involve systemctl, which is a utility for controlling the systemd system and service manager. They specifically interact with the libvirtd service, which is the daemon for the libvirt virtualization API.
The first command (sudo systemctl enable --now libvirtd) both enables the libvirtd service to start on system boot and starts it immediately. The second command (sudo systemctl start libvirtd) would just start the service immediately. If executed in sequence as you provided, the second command wouldn’t have any additional effect since the service is already started by the first command.
You can also check the virtualization service by running this command
sudo systemctl status libvirtd
4. Install Virt-Manager GUI
Run this command to install the GUI.
sudo apt install virt-manager
virt-manager (Virtual Machine Manager) is a desktop user interface for managing virtual machines through libvirt. Essentially, it provides a graphical interface to interact with KVM/QEMU virtual machines, allowing you to create, edit, start, and stop virtual machines, as well as manage their resources and configurations.
It’s a popular tool among those who prefer a GUI for VM management over command-line tools. Once installed, you can launch virt-manager, and it will communicate with the libvirtd service to manage your virtual machines.
5. Add Logged in User to the KVM and Libvirt Group
To add the logged in user to the KVM and Libvirt Groups run the following commands
 sudo usermod -aG kvm $USER
 sudo usermod -aG libvirt $USER
These commands modify the group membership of a user on a Linux system, specifically adding the user to the kvm and libvirt groups, respectively.
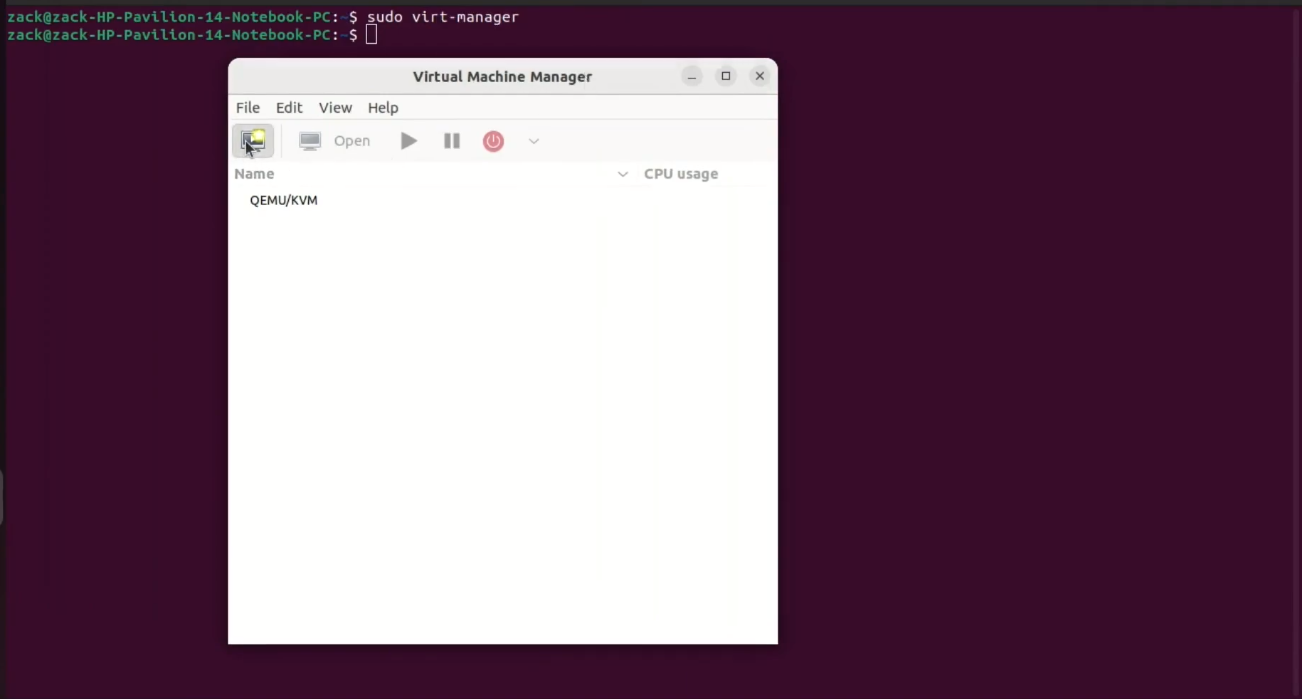
6. Lauch the Virtual Machine Manager
Launch the Virtual Machine Manager GUI with superuser (root) privileges by running this command. You can also launch it from the applications menu.
sudo apt install virt-manager
However, it’s worth noting that, in many setups, if you’ve added your user to the libvirt group (as discussed above), you often don’t need to run virt-manager with sudo because being in the libvirt group provides the necessary permissions to manage virtual machines without superuser rights.
7. Create Virtual Machine
Once QEMU/KVM and Virt-Manager are installed on an Ubuntu system, creating a new virtual machine becomes a straightforward and user-friendly process.
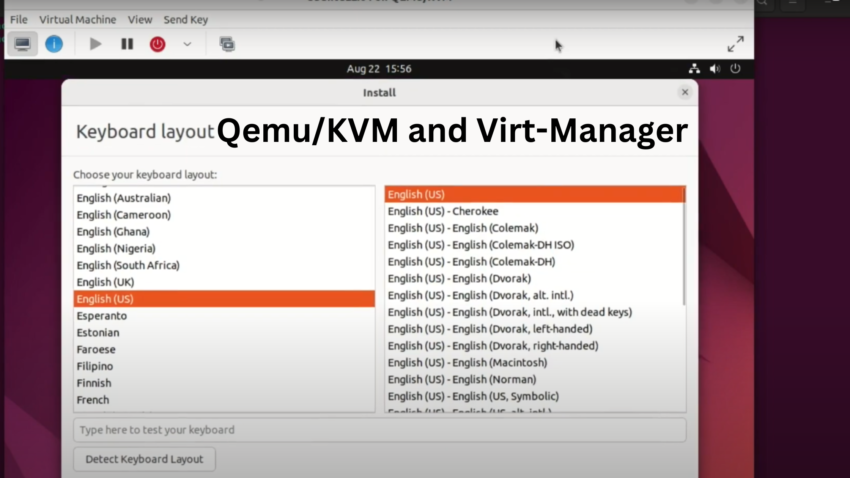
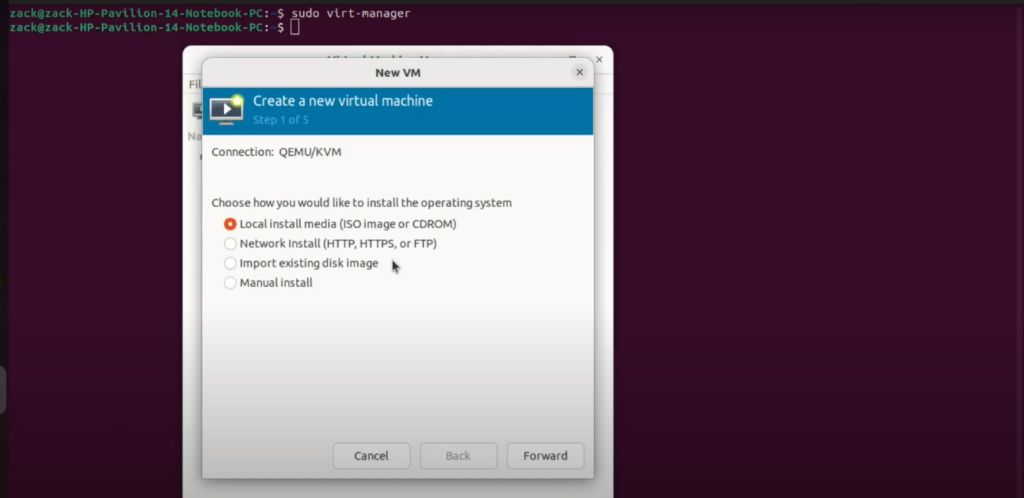
To begin, launch Virt-Manager either from the applications menu or by typing virt-manager in the terminal. In the Virt-Manager window, click on the “Create a new virtual machine” button, typically represented by a computer icon with a green plus sign.
This action initiates the New VM wizard. Here, you can choose to install from an ISO image, a CD/DVD, a network boot, or even clone an existing VM. For most users, selecting an ISO image of the desired operating system is the common choice.
After selecting your installation source, the wizard will guide you through configuring the VM’s resources, such as allocated memory, CPU cores, and disk space.
Once the desired settings are in place, the virtual machine will be created and appear in Virt-Manager’s list of VMs. From this list, you can start, stop, clone, or even delete virtual machines as needed.
The intuitive interface of Virt-Manager paired with the power of QEMU/KVM makes creating and managing virtual machines on Ubuntu both efficient and accessible.
Video: How to Install QEMU/KVM and Virt-Manager on Ubuntu 22.04 LTS
You can check out this video on our YouTube channel on how to install QEMU/KVM and Virt-Manager on Ubuntu 22.04 LTS
Conclusion
You’ve now successfully installed and set up QEMU/KVM and Virt-Manager on Ubuntu 22.04 LTS. With these tools in place, you’re ready to create and manage virtual machines on your Ubuntu system. Enjoy the flexibility and power of virtualization!