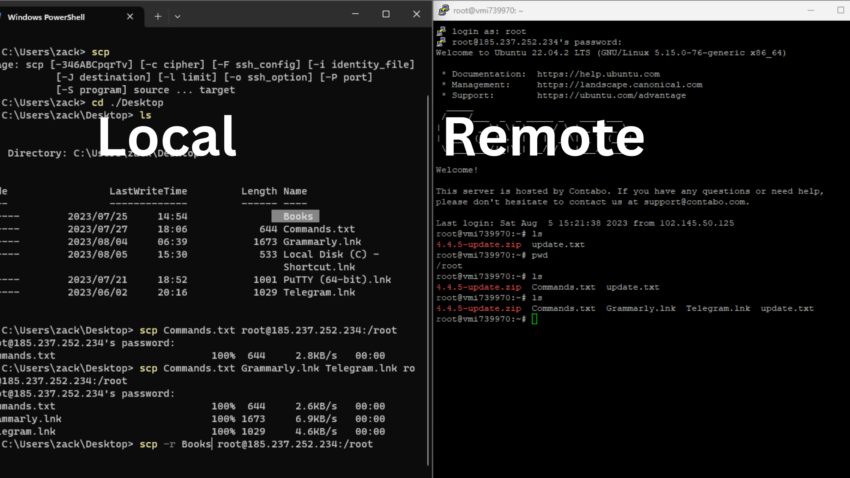
In the interconnected digital world, transferring files between different machines is a routine task. However, the security and integrity of these files during transit are paramount, especially when dealing with sensitive data. Enter the Secure Copy Protocol (SCP), a tool that ensures your data is not compromised during transfer.
The Secure Copy Protocol, often simply referred to as SCP, is a network protocol that leverages the security of Secure Shell (SSH) to facilitate the encrypted transfer of data between different hosts. It can handle file transfers between a local host and a remote host, as well as between two remote hosts.
The SCP command comes with built-in support in most Unix-based systems, including Linux distributions and Mac OS. It is now also included in Windows 11. Its secure nature and simple syntax make it a preferred choice for many system administrators and developers when dealing with file transfers.
This article will serve as a comprehensive guide on how to use the SCP command to securely transfer files. It will cover the basic syntax, the process of transferring files from local to remote systems (and vice versa), transferring files between two remote systems, and exploring advanced features, such as recursive copy and file attributes preservation.
Whether you are a seasoned system administrator or a beginner in the world of networked computers, this guide will equip you with the knowledge to use SCP effectively.
Understanding the Syntax of SCP Command
The basic syntax of the SCP command is as follows:
scp [options] [user@]source_host:source_file [user@]target_host:target_file
The elements of the command are as follows:
options: This can be flags and switches to modify the behavior of the SCP command. Some common options include-r(recursive),-p(preserve file attributes),-q(quiet mode), and-v(verbose mode).user: This is the username on the source or target host.source_hostandtarget_host: These are the IP addresses or domain names of the hosts.source_fileandtarget_file: These are the paths to the source file and target file.
Securely Transferring Files Using SCP
Transfer File from Local to Remote
To copy a local file to a remote system, use the following command:
scp localfile.txt user@remote:/path/to/directory/
This command will transfer the file localfile.txt from the local machine to the remote directory at /path/to/directory/ on the remote machine. The user should be replaced with the actual username on the remote host.
Transfer File from Remote to Local
To copy a file from a remote system to your local system, use the following command:
scp user@remote:/path/to/file/remotefile.txt /local/directory/
Transfer Between Two Remote Systems
To copy a file from one remote system to another, you can use the following command:
scp user@source:/path/to/file.txt user@destination:/path/to/directory/
This command will transfer the file.txt from the source remote host to the destination remote host.
Advanced Usage
Recursive Copy
The -r (recursive) option allows you to copy entire directories. For example, to copy a directory from a local system to a remote system, use the following command:
scp -r /local/directory user@remote:/path/to/directory/
This command will recursively copy all files and subdirectories in /local/directory to the remote host.
Preserving File Attributes
The -p option preserves modification times, access times, and modes from the original file.
scp -p localfile.txt user@remote:/path/to/directory/
Verbose Mode
The -v option enables verbose mode, which provides detailed information about what the SCP command is doing. This is particularly useful for debugging.
scp -v localfile.txt user@remote:/path/to/directory/
Using a Specific SSH Key
To specify a particular SSH key to be used with the SCP command, you can use the -i option:
scp -i /path/to/key.pem localfile.txt user@remote:/path/to/directory/
In this command, /path/to/key.pem should be replaced with the actual path to your SSH private key.
Video: How to Use SCP Command to Transfer Files Securely
Conclusion
The SCP command is a powerful and secure method of transferring files between local and remote hosts or between two remote hosts. It uses SSH for data transfer, providing the same level of security and authentication. It is an essential tool in any developer’s or system administrator’s toolkit for handling file transfers.


