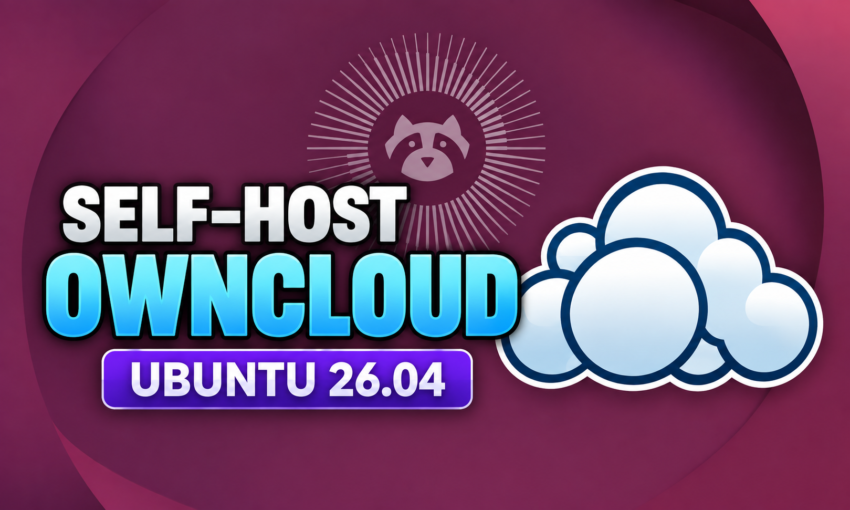
In this tutorial, we will show you how to install ownCloud on Ubuntu 26.04 using Docker and Docker Compose.
ownCloud is an open-source file-sharing and cloud storage platform that allows you to create your own private cloud. Instead of relying entirely on services such as Dropbox or Google Drive, you can host your files on your own VPS and access them remotely through a web browser.
In this guide, we will install Docker, deploy ownCloud with Docker Compose, configure MariaDB and Redis, and use Nginx as a reverse proxy.
We will use the following example domain throughout this tutorial:
cloud.zacstech.biz
Replace this with your own domain or subdomain if you are following the tutorial with a different domain.
Requirements
Before starting, you will need:
- An Ubuntu 26.04 VPS
- Root or sudo access
- A domain or subdomain
- An A record pointing your domain to the VPS IP address
- At least a basic understanding of Linux commands
Step 1: Connect to Your Ubuntu 26.04 VPS
Connect to your VPS using SSH:
ssh root@IP_Address -p Port_number
Replace IP_Address with the public IP address of your VPS.
If your SSH service uses the default port 22, you can simply use:
ssh root@IP_Address
Once connected, check the Ubuntu version:
lsb_release -a
You should see Ubuntu 26.04 LTS and the codename resolute.
Step 2: Create a New User
It is better to manage the installation using a normal user rather than performing everything as root.
Create a user called master:
/usr/sbin/adduser master
Ubuntu will ask you to create a password and provide some optional information.
Use a strong password for this account.
Step 3: Add the User to the Sudo Group
Add the new user to the sudo group:
/usr/sbin/usermod -aG sudo master
The master user can now use sudo to perform administrative tasks.
Step 4: Install Docker
We will install Docker Engine from the official Docker APT repository.
First, update the package list:
apt update
Install the required packages:
apt install -y ca-certificates curl
Create the directory for Docker’s repository key:
install -m 0755 -d /etc/apt/keyrings
Download Docker’s GPG key:
curl -fsSL https://download.docker.com/linux/ubuntu/gpg -o /etc/apt/keyrings/docker.asc
Set the correct permissions:
chmod a+r /etc/apt/keyrings/docker.asc
Now add the Docker repository:
tee /etc/apt/sources.list.d/docker.sources <<EOF
Types: deb
URIs: https://download.docker.com/linux/ubuntu
Suites: $(. /etc/os-release && echo "${UBUNTU_CODENAME:-$VERSION_CODENAME}")
Components: stable
Architectures: $(dpkg --print-architecture)
Signed-By: /etc/apt/keyrings/docker.asc
EOF
Update the package index:
apt update
Now install Docker Engine, Docker CLI, containerd and Docker Compose:
apt install -y docker-ce docker-ce-cli containerd.io docker-buildx-plugin docker-compose-plugin
Step 5: Verify Docker Installation
Check the Docker version:
docker version
You should see information about the Docker client and Docker server.
You can also check that the Docker service is running:
systemctl status docker
If you see the status as active (running), Docker is running correctly.
Press q to exit the status screen.
Step 6: Allow the User to Run Docker Without Sudo
By default, a normal Linux user may not have permission to communicate with the Docker daemon.
Add the master user to the Docker group:
usermod -aG docker master
Now switch to the master user:
su - master
You can test Docker:
docker version
If Docker works without sudo, the configuration is correct.
If you still receive a permission error, log out and log back in so the new group membership is applied.
Step 7: Create the ownCloud Directory
Create a directory for the ownCloud Docker installation:
mkdir owncloud-docker
Enter the directory:
cd owncloud-docker
You can confirm your current directory with:
pwd
Step 8: Create the Docker Compose File
Create the Docker Compose configuration:
nano docker-compose.yml
Paste the following configuration:
volumes:
  files:
    driver: local
  mysql:
    driver: local
  redis:
    driver: local

services:
  owncloud:
    image: owncloud/server:${OWNCLOUD_VERSION}
    container_name: owncloud_server
    restart: always
    ports:
      - ${HTTP_PORT}:8080
    depends_on:
      - mariadb
      - redis
    environment:
      - OWNCLOUD_DOMAIN=${OWNCLOUD_DOMAIN}
      - OWNCLOUD_TRUSTED_DOMAINS=${OWNCLOUD_TRUSTED_DOMAINS}
      - OWNCLOUD_DB_TYPE=mysql
      - OWNCLOUD_DB_NAME=owncloud
      - OWNCLOUD_DB_USERNAME=owncloud
      - OWNCLOUD_DB_PASSWORD=owncloud
      - OWNCLOUD_DB_HOST=mariadb
      - OWNCLOUD_ADMIN_USERNAME=${ADMIN_USERNAME}
      - OWNCLOUD_ADMIN_PASSWORD=${ADMIN_PASSWORD}
      - OWNCLOUD_MYSQL_UTF8MB4=true
      - OWNCLOUD_REDIS_ENABLED=true
      - OWNCLOUD_REDIS_HOST=redis
    healthcheck:
      test: ["CMD", "/usr/bin/healthcheck"]
      interval: 30s
      timeout: 10s
      retries: 5
    volumes:
      - files:/mnt/data

  mariadb:
    image: mariadb:10.11
    container_name: owncloud_mariadb
    restart: always
    environment:
      - MYSQL_ROOT_PASSWORD=owncloud
      - MYSQL_USER=owncloud
      - MYSQL_PASSWORD=owncloud
      - MYSQL_DATABASE=owncloud
      - MARIADB_AUTO_UPGRADE=1
    command: ["--max-allowed-packet=128M", "--innodb-log-file-size=64M"]
    healthcheck:
      test: ["CMD", "mysqladmin", "ping", "-u", "root", "--password=owncloud"]
      interval: 10s
      timeout: 5s
      retries: 5
    volumes:
      - mysql:/var/lib/mysql

  redis:
    image: redis:6
    container_name: owncloud_redis
    restart: always
    command: ["--databases", "1"]
    healthcheck:
      test: ["CMD", "redis-cli", "ping"]
      interval: 10s
      timeout: 5s
      retries: 5
    volumes:
      - redis:/data
Save the file and exit Nano.
If you are using Nano:
Ctrl + O → Enter → Ctrl + X
Step 9: Create the .env File
The Docker Compose configuration uses environment variables, so we need to create a .env file.
Run:
nano .env
Add:
OWNCLOUD_VERSION=10.16
OWNCLOUD_DOMAIN=cloud.zacstech.biz
OWNCLOUD_TRUSTED_DOMAINS=cloud.zacstech.biz
ADMIN_USERNAME=admin
ADMIN_PASSWORD=CHANGE_THIS_TO_A_STRONG_PASSWORD
HTTP_PORT=8080
Important
Replace:
CHANGE_THIS_TO_A_STRONG_PASSWORD
with a strong and unique password.
For example:
ADMIN_PASSWORD=YourVeryStrongPasswordHere
Do not use the example password in a production installation.
Save and exit Nano.
Step 10: Start ownCloud
We can now start the ownCloud containers.
Run:
docker compose up -d
Docker will download the required images and start the containers.
This can take a few minutes depending on the speed of your VPS and internet connection.
Check the containers:
docker ps
You should see:
owncloud_server
owncloud_mariadb
owncloud_redis
with their status showing that they are running.
Step 11: Check the ownCloud Logs
To monitor the ownCloud container, run:
docker logs -f owncloud_server
This allows you to watch the startup process.
When you are finished checking the logs, press:
Ctrl + C
You can also check all containers with:
docker compose ps
Step 12: Configure DNS
Before configuring Nginx, make sure your domain points to your VPS.
For this tutorial, we are using:
cloud.zacstech.biz
Create an A record with your DNS provider:
Type: A
Name: cloud
Value: YOUR_VPS_IP_ADDRESS
For example:
cloud.zacstech.biz → 123.123.123.123
Replace the example IP address with the actual public IP address of your VPS.
You can check whether DNS is resolving correctly with:
ping cloud.zacstech.biz
You can also use:
dig cloud.zacstech.biz
If dig is not installed, install it with:
sudo apt install -y dnsutils
Step 13: Install Nginx
Now we will install Nginx.
Run:
sudo apt install -y nginx
Check the Nginx service:
sudo systemctl status nginx
Nginx should show as:
active (running)
Press q to exit.
Step 14: Configure Nginx as a Reverse Proxy
Create an Nginx configuration file:
sudo nano /etc/nginx/conf.d/owncloud.conf
Add:
server {
    listen 80;
    server_name cloud.zacstech.biz;

    location / {
        proxy_pass http://localhost:8080;
        proxy_set_header Host $host;
        proxy_set_header X-Real-IP $remote_addr;
        proxy_set_header X-Forwarded-For $proxy_add_x_forwarded_for;
        proxy_set_header X-Forwarded-Proto $scheme;
    }
}
Save the file and exit.
Step 15: Test the Nginx Configuration
Before restarting Nginx, it is a good idea to test the configuration.
Run:
sudo nginx -t
If everything is correct, you should see:
syntax is ok
test is successful
Now restart Nginx:
sudo systemctl restart nginx
Step 16: Open ownCloud
You should now be able to access ownCloud using:
http://cloud.zacstech.biz
Open the address in your web browser.
You should see the ownCloud login page.
Use the administrator username and password that you configured in the .env file.
Step 17: Secure ownCloud With HTTPS
At this point, ownCloud is running, but it is still using HTTP.
For a production server, you should secure the connection with HTTPS.
We can use Let’s Encrypt and Certbot.
Install Certbot and the Nginx plugin:
sudo apt install -y certbot python3-certbot-nginx
Now request an SSL certificate:
sudo certbot --nginx -d cloud.zacstech.biz
Certbot will ask for some information and can automatically modify the Nginx configuration to enable HTTPS.
After the certificate has been installed, access ownCloud using:
https://cloud.zacstech.biz
Step 18: Check Automatic Certificate Renewal
Let’s Encrypt certificates need to be renewed periodically.
You can test the renewal process with:
sudo certbot renew --dry-run
If the test completes successfully, automatic renewal should be working.
Useful Docker Commands
Here are some useful commands for managing your ownCloud installation.
View running containers
docker ps
View all containers
docker ps -a
View ownCloud logs
docker logs owncloud_server
Follow ownCloud logs
docker logs -f owncloud_server
View Docker Compose status
docker compose ps
Restart the ownCloud stack
From inside the owncloud-docker directory:
docker compose restart
Stop the containers
docker compose stop
Start the containers again
docker compose start
Restart everything
docker compose down
docker compose up -d
Update the containers
From the ownCloud directory:
docker compose pull
docker compose up -d
Check Docker Volumes
The installation uses Docker volumes to store the ownCloud files, MariaDB database and Redis data.
List the volumes with:
docker volume ls
You can inspect them with:
docker volume inspect owncloud-docker_files
The exact volume names may vary depending on the Docker Compose project name.
Important Security Recommendations
Before using your ownCloud installation for important files, there are several things you should do.
1. Use HTTPS
Always use HTTPS for your ownCloud installation.
Your final URL should look like:
https://cloud.zacstech.biz
2. Use Strong Passwords
Do not use simple passwords such as:
admin
password
123456
Use long, unique passwords for the ownCloud administrator and your server accounts.
3. Protect Your VPS
Consider configuring a firewall and only exposing the ports that are actually required.
For example, a typical web server will need:
22    SSH
80    HTTP
443   HTTPS
If you use a custom SSH port, replace port 22 with your actual SSH port.
4. Keep Docker Updated
Periodically check for updated Docker images:
docker compose pull
Then recreate the containers:
docker compose up -d
5. Back Up Your Data
Docker volumes contain important data, including your ownCloud files and database.
Do not assume that Docker volumes are backups.
Create regular backups and, preferably, store copies on another server or storage provider.
Conclusion
In this tutorial, we installed ownCloud on Ubuntu 26.04 using Docker and Docker Compose.
We installed Docker from the official Docker repository, created a dedicated Linux user, deployed ownCloud together with MariaDB and Redis, configured Nginx as a reverse proxy, connected our domain and secured the installation with HTTPS.
You can now use your ownCloud server as a private cloud storage and file-sharing platform.
If you are following this tutorial from our YouTube video, all of the commands and configuration files are available on this page so you can easily copy and paste them into your own server.
Remember to replace the example domain, IP address and passwords with your own values before running the commands.
Video: