As digital landscapes expand, an increasing number of businesses, bloggers, and developers are in pursuit of efficient and cost-effective solutions to establish their online presence. One of the most popular platforms for creating websites is WordPress, boasting flexibility, ease of use, and an extensive ecosystem of plugins and themes.
Now, when it comes to hosting a WordPress site, there are myriad options available. One such option that has garnered attention is Contabo‘s Virtual Private Server (VPS) solutions. VPS hosting strikes a balance between shared hosting and dedicated servers, offering more resources, better performance, and increased control, often without the hefty price tag of dedicated solutions.
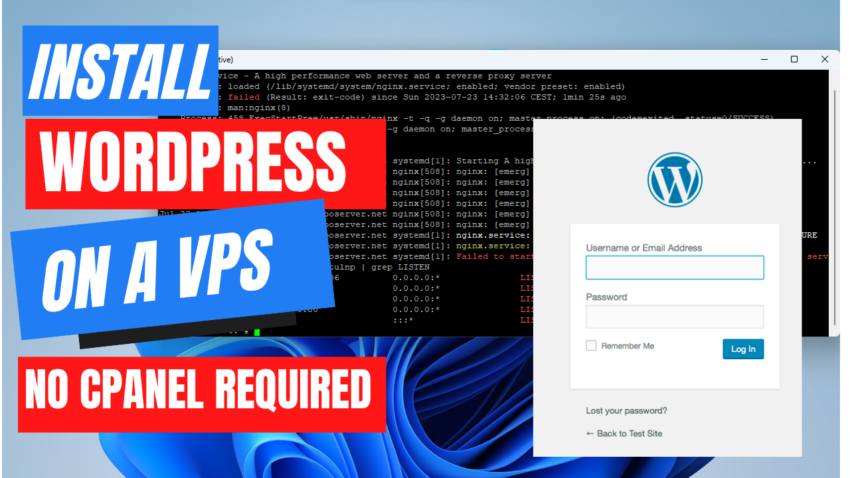
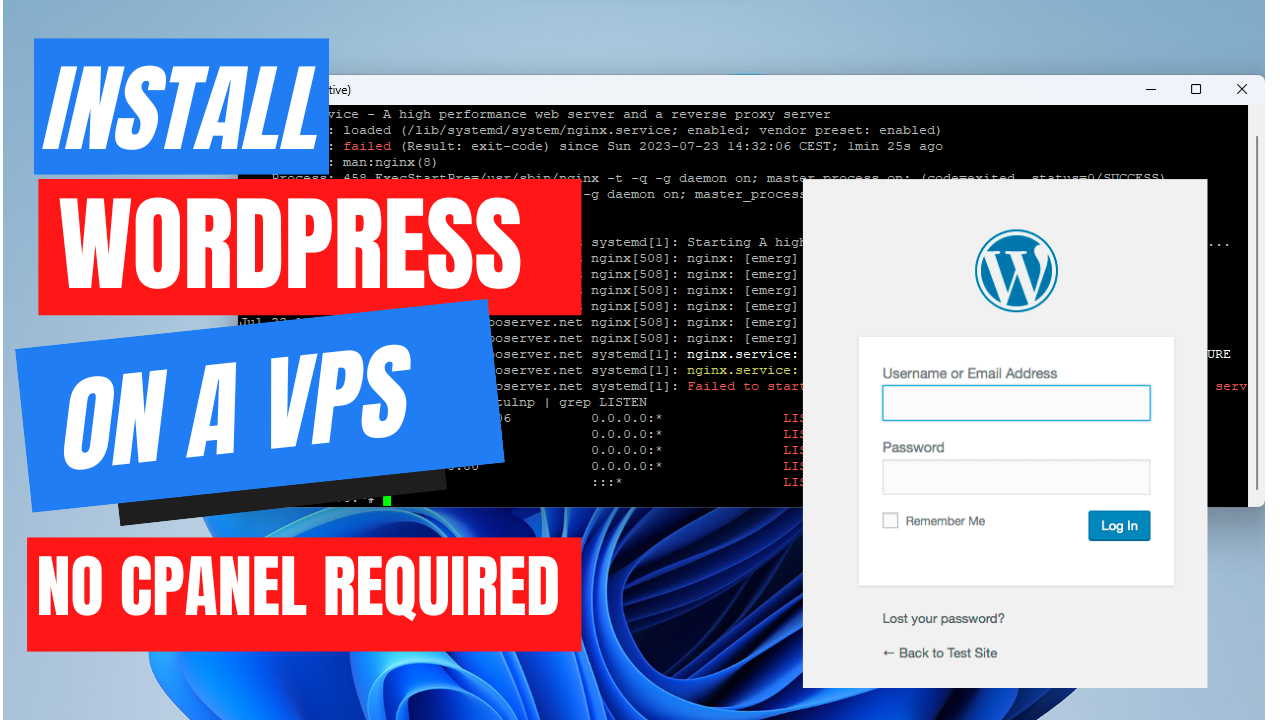
In this comprehensive guide on how to install WordPress on Contabo VPS, we’ll embark on a step-by-step journey, navigating through server configurations, software installations, database setups, and finally, launching a WordPress site on a Contabo VPS.
By the end, you’ll have the knowledge and confidence to set up your site and join the ranks of countless others who’ve leveraged the power of WordPress on Contabo’s robust VPS offerings.
Why install WordPress without Cpanel
But what if you’re venturing into this space without the familiar interface of cPanel? cPanel, a prevalent web hosting control panel, simplifies tasks like installing software, managing domains, and setting up email.
However, for various reasons, users might opt not to use cPanel. It could be due to cost considerations (cPanel licensing fees), a preference for a leaner server setup, or the desire for a more hands-on approach to server management.
What does shared hosting mean?
Shared hosting is one of the most prevalent and cost-effective solutions for individuals and small businesses looking to establish an online presence. At its core, shared hosting is analogous to living in an apartment complex.
Just as several tenants share common facilities like the swimming pool, gym, or laundry room in an apartment, websites hosted on a shared server share the server’s resources.
This means that multiple websites are hosted on a single physical server, utilizing the same CPU, memory, storage space, and bandwidth.
This pooled resource approach allows hosting providers to distribute the cost of maintaining the server across multiple clients, leading to the affordability that shared hosting is known for.
However, just as apartment dwellers might experience noise from neighbors or find the shared pool crowded, websites on shared hosting might face slower loading times or downtimes, especially if one of the websites experiences a traffic surge or uses a disproportionate amount of resources.
To manage this, hosting providers implement certain limits on resources to ensure fair usage. For many, shared hosting is the ideal entry point due to its simplicity, as most technical aspects, including software installations, security, and updates, are managed by the hosting provider.
However, as businesses grow and website traffic increases, they might find the need to upgrade to more resource-rich and isolated hosting solutions, such as VPS or dedicated hosting, to ensure optimal performance and security.
VPS Hosting Unveiled

Virtual Private Server (VPS) hosting represents a significant step forward from shared hosting in the realm of web hosting solutions, offering a harmonious blend of affordability, control, and performance.
Imagine a large, powerful computer subdivided into multiple isolated environments using virtualization technology. Each of these environments operates as a distinct server with its dedicated resources, such as CPU, RAM, and storage.
This is the essence of VPS hosting. Unlike shared hosting, where multiple websites tap into a common pool of server resources, each website on a VPS has its allocated resources, ensuring more consistent performance, even during traffic surges.
One of the standout features of VPS hosting is the level of control it grants users. With root access to the server, users can customize their environment, install software, run specific versions of applications, and fine-tune server configurations to match their requirements.
This flexibility makes VPS hosting especially appealing to developers, tech-savvy business owners, and websites with specialized needs. Moreover, since each VPS operates in an isolated silo, security risks associated with shared neighbors are drastically reduced.
In the grand spectrum of hosting solutions, VPS hosting sits comfortably between shared hosting and dedicated hosting.
It provides a balanced offering that caters to websites and businesses that have outgrown the limitations of shared hosting but aren’t quite ready for the financial or resource commitment of a dedicated server.
Prerequisites:
- A Contabo VPS was purchased and set up. (You can watch the video below on how to purchase a Contabo VPS)
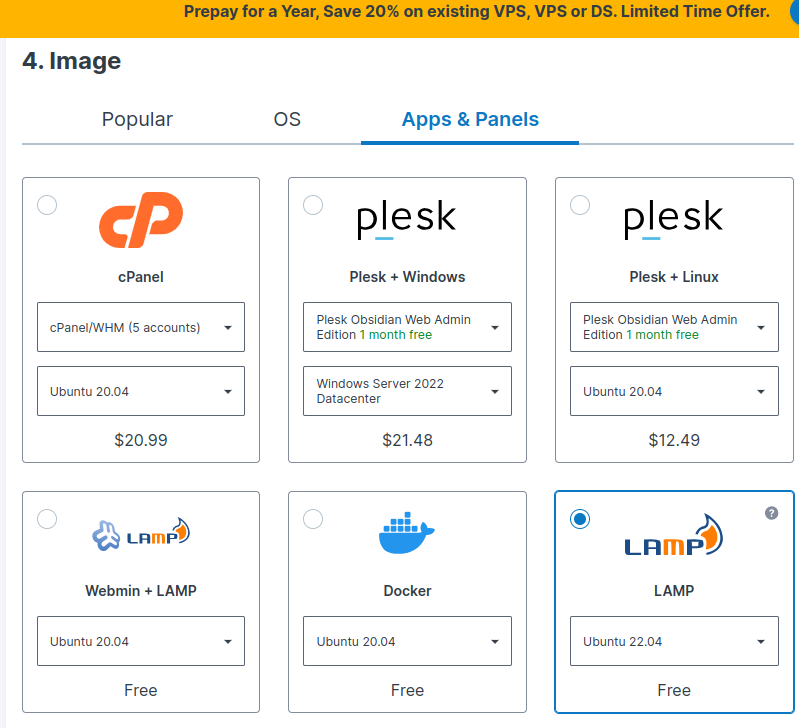
- Install LAMP Stack and the Ubuntu 22.04 OS on the Apps & Panel when purchasing the Contabo VPS (LAMP stands for Linux, Apache, MSQL, and PHP). Together, these tools form a powerful and popular combination for web hosting.
- A domain name (Check out this video on how to get one)
- Map the Domain Name to your Contabo VPS Server. (Configure your DNS Records to map the domain name to your VPS IP address)
- SSH access to your VPS.
- Basic knowledge of Linux commands.
Install WordPress on Contabo: Step-by-step Installation
1. Access your VPS:
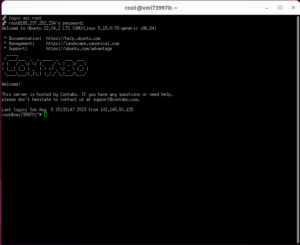
Gaining access to your Virtual Private Server (VPS) on Contabo is a crucial first step toward managing your web hosting environment, and it primarily involves using SSH (Secure Shell), a network protocol for secure remote login.
Upon setting up your VPS on Contabo, you’ll receive essential credentials including your server’s IP address, username, and password via email.
To access your VPS, open a terminal if you’re on a Linux or macOS system, or use a terminal emulator like PuTTY, If you’re on Windows.
In the terminal, type ssh username@your_server_ip, substituting ‘username’ with the actual username you’ve been provided (often ‘root’ for initial setups) and ‘your_server_ip’ with the specific IP address of your Contabo VPS.
After hitting enter, you’ll be prompted to enter your password. Once you input the password and press enter, you’ll be logged into your VPS. For first-time connections, you’ll see a security prompt asking you to confirm the server’s fingerprint; type ‘yes’ and proceed.
Now, you have secure command-line access to your Contabo VPS, enabling you to manage files, execute commands, and install software.
This basic yet powerful method of accessing your Contabo VPS is foundational for a range of server management tasks, from installing web services like Apache or Nginx to setting up databases and beyond.
2. Update Your Server:
Always ensure that your server is updated before installing new software. Keeping an Ubuntu system updated ensures that you benefit from the latest security patches, software features, and bug fixes.
sudo apt <span class="hljs-keyword">update</span> <span class="hljs-operator">&&</span> sudo apt upgrade <span class="hljs-operator">-</span>y
3. Install Necessary Software:
Before diving into the installation of WordPress, one must first lay down the foundational software infrastructure that the platform requires to operate smoothly, and this is where the LAMP stack comes into play.
LAMP, an acronym for Linux, Apache, MySQL, and PHP, represents a cohesive suite of software tools that together form the backbone of many web applications, including WordPress. Starting with Linux, it provides a stable and secure operating system environment for our web server.
Installing and properly configuring the LAMP components ensures that when WordPress is finally set up, it runs seamlessly, and securely, and can fully leverage the capabilities of the server.
Luckily with Contabo you just have to select the LAMP stack when purchasing the VPS. If you did not you can still reinstall the Ubuntu system with LAMP from the management dashboard.
4. Create a MySQL Database:
Having installed the LAMP stack when purchasing the VPS, our server already has a MySQL database server in place.
Log in to MySQL:
sudo mysql -u root -p
Enter the password for the root user that was sent to you in your email or the one you entered when setting up the VPS.
Now, create a database
CREATE DATABASE <strong>wordpress</strong> DEFAULT CHARACTER SET utf8 COLLATE utf8_unicode_ci<strong>; </strong>
Here’s what each segment does:
- CREATE DATABASE wordpress: This instructs the MySQL or MariaDB server to create a new database named “wordpress”.
- DEFAULT CHARACTER SET utf8: This sets the default character encoding for the database to
utf8. Theutf8character encoding can represent any character in the Unicode standard, making it a popular choice for databases that might store text in various languages. - COLLATE utf8_unicode_ci: This defines the default collation (or rule set) for text sorting and comparison in the database. The
utf8_unicode_cicollation is case-insensitive (cistands for “case insensitive”) and uses Unicode rules for sorting text.
When this command is executed in a MySQL or MariaDB server, it will create a new database configured with the specified character set and collation. This setup is commonly recommended for WordPress installations to ensure broad compatibility with various languages and special characters.
Create a user:
CREATE USER 'wordpressuser'@'localhost' IDENTIFIED BY 'Enter_Your_Password_Here';
This SQL command provided is for creating a new user for a MySQL or MariaDB database:
Here’s a breakdown:
- CREATE USER ‘wordpressuser’@’localhost’: This part of the command instructs the SQL server to create a new user named “wordpressuser” who will connect from “localhost” (i.e., the same machine the MySQL server is on).
- IDENTIFIED BY ‘Enter_Your_Password_Here’: This section specifies the password for the new user. It’s crucial to replace
'Enter_Your_Password_Here'with a strong password to ensure the security of your database.
After executing this command, you’ll have a new user named “wordpressuser” set up. For security reasons, always remember to use a unique and strong password.
Grant permissions to the user:
GRANT ALL ON wordpress.* TO 'wordpressuser'@'localhost' IDENTIFIED BY 'enter_a_custom_password_here';
Here’s a detailed breakdown:
- GRANT ALL ON wordpress.*: This part of the command gives full permissions (i.e., ALL privileges) to the user for the “wordpress” database. The
.*indicates permissions are granted for all tables and entities within the “wordpress” database. - TO ‘wordpressuser’@’localhost’: This designates the user (in this case, “wordpressuser”) and the location from which they’ll connect (here, “localhost” or the same machine the MySQL server is on) that the permissions are being granted to.
- IDENTIFIED BY ‘enter_a_custom_password_here’: This sets or confirms the password for the user. As always, you should replace
'enter_a_custom_password_here'with a strong, unique password to ensure the security of your database.
After executing this command, the user “wordpressuser” will have full permissions to perform any operation on the “wordpress” database. It’s vital to ensure that only trusted users have such extensive permissions to maintain the security and integrity of your data.
Congratulations! You’ve successfully created a database and granted a user full access and permissions to manage it.
Run this command
FLUSH PRIVILEGES;
It is an essential SQL directive used in MySQL and MariaDB databases. When you make changes to user privileges, those changes aren’t always immediately recognized by the database.
The FLUSH PRIVILEGES command tells the database system to reload the user privileges from the grant tables in the database, ensuring that all recent changes are taken into account.
In simpler terms, after making changes to user permissions or granting new privileges, use this command to ensure the database updates and recognizes those changes.
This step is especially important when setting up or modifying access controls for users to ensure the correct permissions are actively in place.
You can exit out of MySQL by using this command:
EXIT;
5. Install required PHP extensions:
When setting up a PHP-based application like WordPress, certain plugins or themes might require these extensions. Hence, installing them ensures broader compatibility with various PHP software.
sudo apt install php-curl php-gd php-mbstring php-xml php-xmlrpc php-soap php-intl php-zip
Restart the Apache web service by running this command
sudo systemctl restart apache2
This is a Linux command that instructs the system to restart the Apache2 web server using the systemd init system, which is prevalent in many modern Linux distributions.
Here’s a brief explanation:
- sudo: This prefix grants administrative permissions and is essential when making changes or performing actions that require root privileges.
- systemctl: This is the primary command to interact with the
systemdsystem and service manager. With it, you can start, stop, restart, and manage other states of services. - restart: This argument tells
systemctlthat you want to restart the specified service. - apache2: This is the name of the service you want to restart. In this case, it’s the Apache2 web server.
Upon running this command, the Apache2 web server will stop and then immediately start again. This is commonly done to ensure that any recent configurations or changes made to Apache take effect. If you’ve modified the httpd.conf file or any related configuration files, for instance, you’d use this command to apply those changes.
6. Install WordPress:
Navigate to the web root directory:
</span>cd /var/www/html <span style="font-family: Merriweather;">
Download the latest version of WordPress:
</span>curl -O https://wordpress.org/latest.tar.gz <span style="font-family: Merriweather;">
Extract the files:
tar xzvf latest.tar.gz
For the other tasks you can watch the video below from minute 7:28 – 11:51
7. Apache configurations
Great job! With WordPress now installed, the next step is to configure Apache to allow us to access our website via our domain name. Please reopen WinSCP (as shown in the video) and go to the following directory: /etc/apache2/sites-available/.
Next, create a blank file and name it “domain.conf” (replace “domain” with your actual domain name).
Now, open the “domain.conf” file, copy the content provided below, paste it inside, and then save the file.
<VirtualHost *:80>
     ServerAdmin admin@domain
     DocumentRoot /var/www/html/
     ServerName domain
     ServerAlias domain

     <Directory /var/www/html/>
        Options +FollowSymlinks
        AllowOverride All
        Require all granted
     </Directory>

     ErrorLog ${APACHE_LOG_DIR}/error.log
     CustomLog ${APACHE_LOG_DIR}/access.log combined

</VirtualHost>
Breakdown of the configuration:
The configuration provided is a template for an Apache VirtualHost. VirtualHosts allow Apache to serve different websites or web applications based on the domain name or IP address used to access the server. Here’s a breakdown of the configuration:
<VirtualHost *:80>: This line starts the VirtualHost definition, specifying that it’s for any IP address (*) on port 80 (the default port for HTTP).- ServerAdmin: Specifies the email address of the webmaster or server admin. In this template, it’s set to
admin@domain. - DocumentRoot: This points to the directory on the server where the website’s files are located. Here, it’s set to
/var/www/html/. - ServerName: Specifies the primary domain name for this VirtualHost. Here, it’s set as a placeholder
domain. - ServerAlias: This allows you to set alternate domain names for the same site. It’s also set to
domainin this template, but in real use, you might have something likewww.domain.com. <Directory /var/www/html/>: This block defines options for the specified directory and its subdirectories.- Options +FollowSymlinks: This allows Apache to follow symbolic links in the directory.
- AllowOverride All: This permits
.htaccessfiles within the directory to override Apache’s global settings. - Require all granted: Grants access to the directory for all users.
- ErrorLog: Specifies where the server will log errors. The
${APACHE_LOG_DIR}variable usually points to Apache’s default log directory, typically something like/var/log/apache2/. - CustomLog: Specifies where the server will log access requests. The
combinedformat includes additional information like the referrer and user-agent. </VirtualHost>: This line ends the VirtualHost definition.
When using this template in a real-world scenario, you’ll want to replace the placeholders (domain, admin@domain) with appropriate values to match your specific domain and setup.
Enable configuration in Apache and restart the service.
Run the following commands to finish the setup:
sudo a2ensite domain.conf
sudo a2enmod rewrite
sudo systemctl restart apache2.service
Then, assign the right permissions:
sudo chown -R www-data:www-data /var/www/html
This command is used to change the ownership of the /var/www/html directory and its contents on a Linux system. Here’s a breakdown:
- sudo: This is a prefix that grants administrative permissions. Using
sudomeans you’re executing the command with superuser (root) privileges, which is often required for system-level changes. - chown: This stands for “change owner”. It’s the Linux command used to change the ownership of files and directories.
- -R: This is an option for the
chowncommand which means “recursive”. It ensures that the ownership change applies not only to the specified directory but also to all of its contents, including subdirectories and their files. - www-data:www-data: This specifies the new owner and group for the file or directory. In many Linux distributions,
www-datais the default user and group under which the Apache web server runs. By changing the ownership towww-data, you’re ensuring that Apache has the appropriate permissions to read, write, and execute files in the/var/www/htmldirectory. - /var/www/html: This is the target directory whose ownership you’re changing. It’s a common default directory for web content on servers running the Apache web server.
In essence, by running this command, you’re ensuring that the Apache web server has the proper permissions to manage and serve content from the /var/www/html directory. This is especially useful when setting up web applications like WordPress, as it may need to create or modify files within this directory.
Now run the following two find commands to set the correct permissions on the WordPress directories and files:
sudo find /var/www/html/ -type d -exec chmod 750 {} \;
sudo find /var/www/html/ -type f -exec chmod 640 {} \;
8. Setup WordPress Config File
To get secure values from the WordPress secret key generator, run the following command:
sudo chown -R www-data:www-data /var/www/html
This command retrieves unique security keys and salts from the official WordPress API. Here’s a breakdown:
- curl: This is a command-line tool used for transferring data with URLs. It supports a variety of protocols including HTTP, HTTPS, FTP, and more.
- -s: This flag tells curl to operate in “silent” mode. It means that curl won’t display progress information or error messages.
- https://api.wordpress.org/secret-key/1.1/salt/: This is the URL that curl is fetching data from. It points to WordPress’s official API endpoint for generating unique security keys and salts.
When setting up a WordPress installation manually, the wp-config.php file requires unique security keys and salts. Instead of coming up with these values yourself, WordPress provides this API endpoint to generate them for you. This ensures that the keys and salts are complex and unique, thereby enhancing the security of your WordPress installation.
When you run this command, you’ll receive a series of define statements with unique keys and salts that can be directly copied and pasted into your wp-config.php file. This step is critical for the security of your WordPress site, as these keys and salts play a crucial role in encrypting information stored in user cookies, making it harder for malicious users to hijack sessions.
You will get unique values that look like this:
Outputdefine('AUTH_KEY',         '1jl/vqfs<XhdXoAPz9 DO NOT COPY THESE VALUES c_j{iwqD^<+c9.k<J@4H');
define('SECURE_AUTH_KEY',  'E2N-h2]Dcvp+aS/p7X DO NOT COPY THESE VALUES {Ka(f;rv?Pxf})CgLi-3');
define('LOGGED_IN_KEY',    'W(50,{W^,OPB%PB<JF DO NOT COPY THESE VALUES 2;y&,2m%3]R6DUth[;88');
define('NONCE_KEY',        'll,4UC)7ua+8<!4VM+ DO NOT COPY THESE VALUES #`DXF+[$atzM7 o^-C7g');
define('AUTH_SALT',        'koMrurzOA+|L_lG}kf DO NOT COPY THESE VALUES  07VC*Lj*lD&?3w!BT#-');
define('SECURE_AUTH_SALT', 'p32*p,]z%LZ+pAu:VY DO NOT COPY THESE VALUES C-?y+K0DK_+F|0h{!_xY');
define('LOGGED_IN_SALT',   'i^/G2W7!-1H2OQ+t$3 DO NOT COPY THESE VALUES t6**bRVFSD[Hi])-qS`|');
define('NONCE_SALT',       'Q6]U:K?j4L%Z]}h^q7 DO NOT COPY THESE VALUES 1% ^qUswWgn+6&xqHN&%');
Now open the wp-config file with either your FTP like WinSCP, Filezilla or via command line and update the file with the above auto-generated lines.
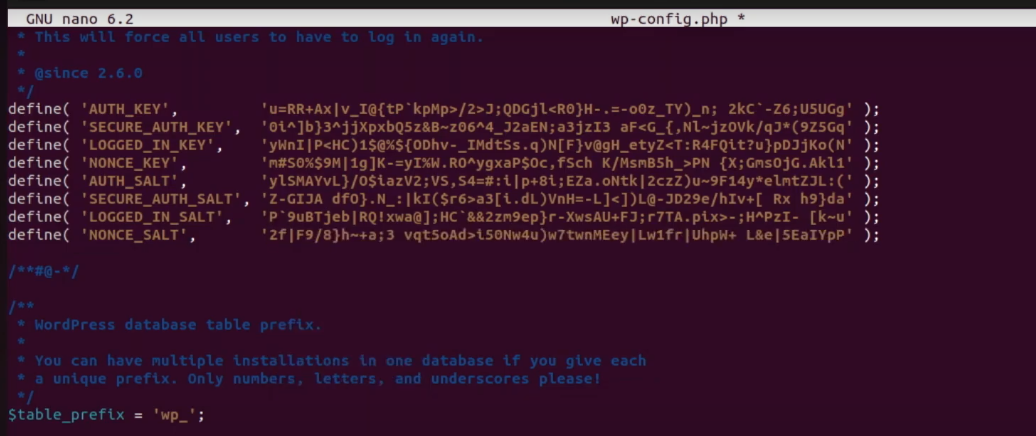
Use the up and down arrow to update the wp-config file. Press CTRL+X, then ‘Y’ then hit enter and you will exit the saved file.
9. Complete the Installation via Web Browser:
Now, go to your web browser and navigate to your server’s IP address. You should see the WordPress installation page. Follow the on-screen instructions to complete the setup.
In your web browser, navigate to your server’s domain name or public IP address:
http://server_domain
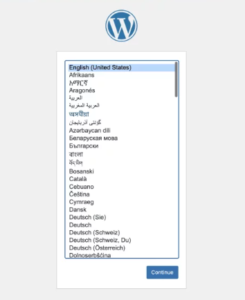 Choose the language you would like to use: Then you will be prompted to supply your database credential. Just supply them and continue.
Video: How To Install WordPress on Contabo VPS
Conclusion: How To Install WordPress on Contabo VPS
And there you have it! This is how to Install WordPress on Contabo VPS. WordPress should now be installed on your Contabo VPS without cPanel. From here, you can start customizing your site, installing themes, and adding plugins as desired.
Don’t forget to set up regular backups and implement security measures to keep your site safe!
